
“It’s the mossttt wonderful timeeee of the yeaarrrrrrr!” I’ve been humming Christmas carols to myself at work all morning, and came to the realization that I have become one of those people that are annoyingly excited about the holidays. As in cinnamon scented candles all over the house, purchased not one but two Christmas sweaters, holiday music blaring, you get it. As most of you know, my Mom is Christian and my Dad is Jewish, so we celebrate both holidays, meaning double the dinners! What’s not to love about that??
With holidays comes family traditions. I’m sure you all have that cousin who insists on her “secret” stuffing recipe, an Aunt who masters the jello mold, or a grandparent who force feeds you immense amounts of corn pudding. Not that I don’t love tradition, but sometimes it’s time for an amendment to the Christmas/Hanukkah classics, and I think I found the perfect one.
By now you can tell that I frequently fangirl over Deb from Smitten Kitchen, and there’s a reason for that. Her recipes are easy to follow and always turn out fabulous. This gorgeous, decadent, and most importantly easy salted caramel apple tart is no exception.
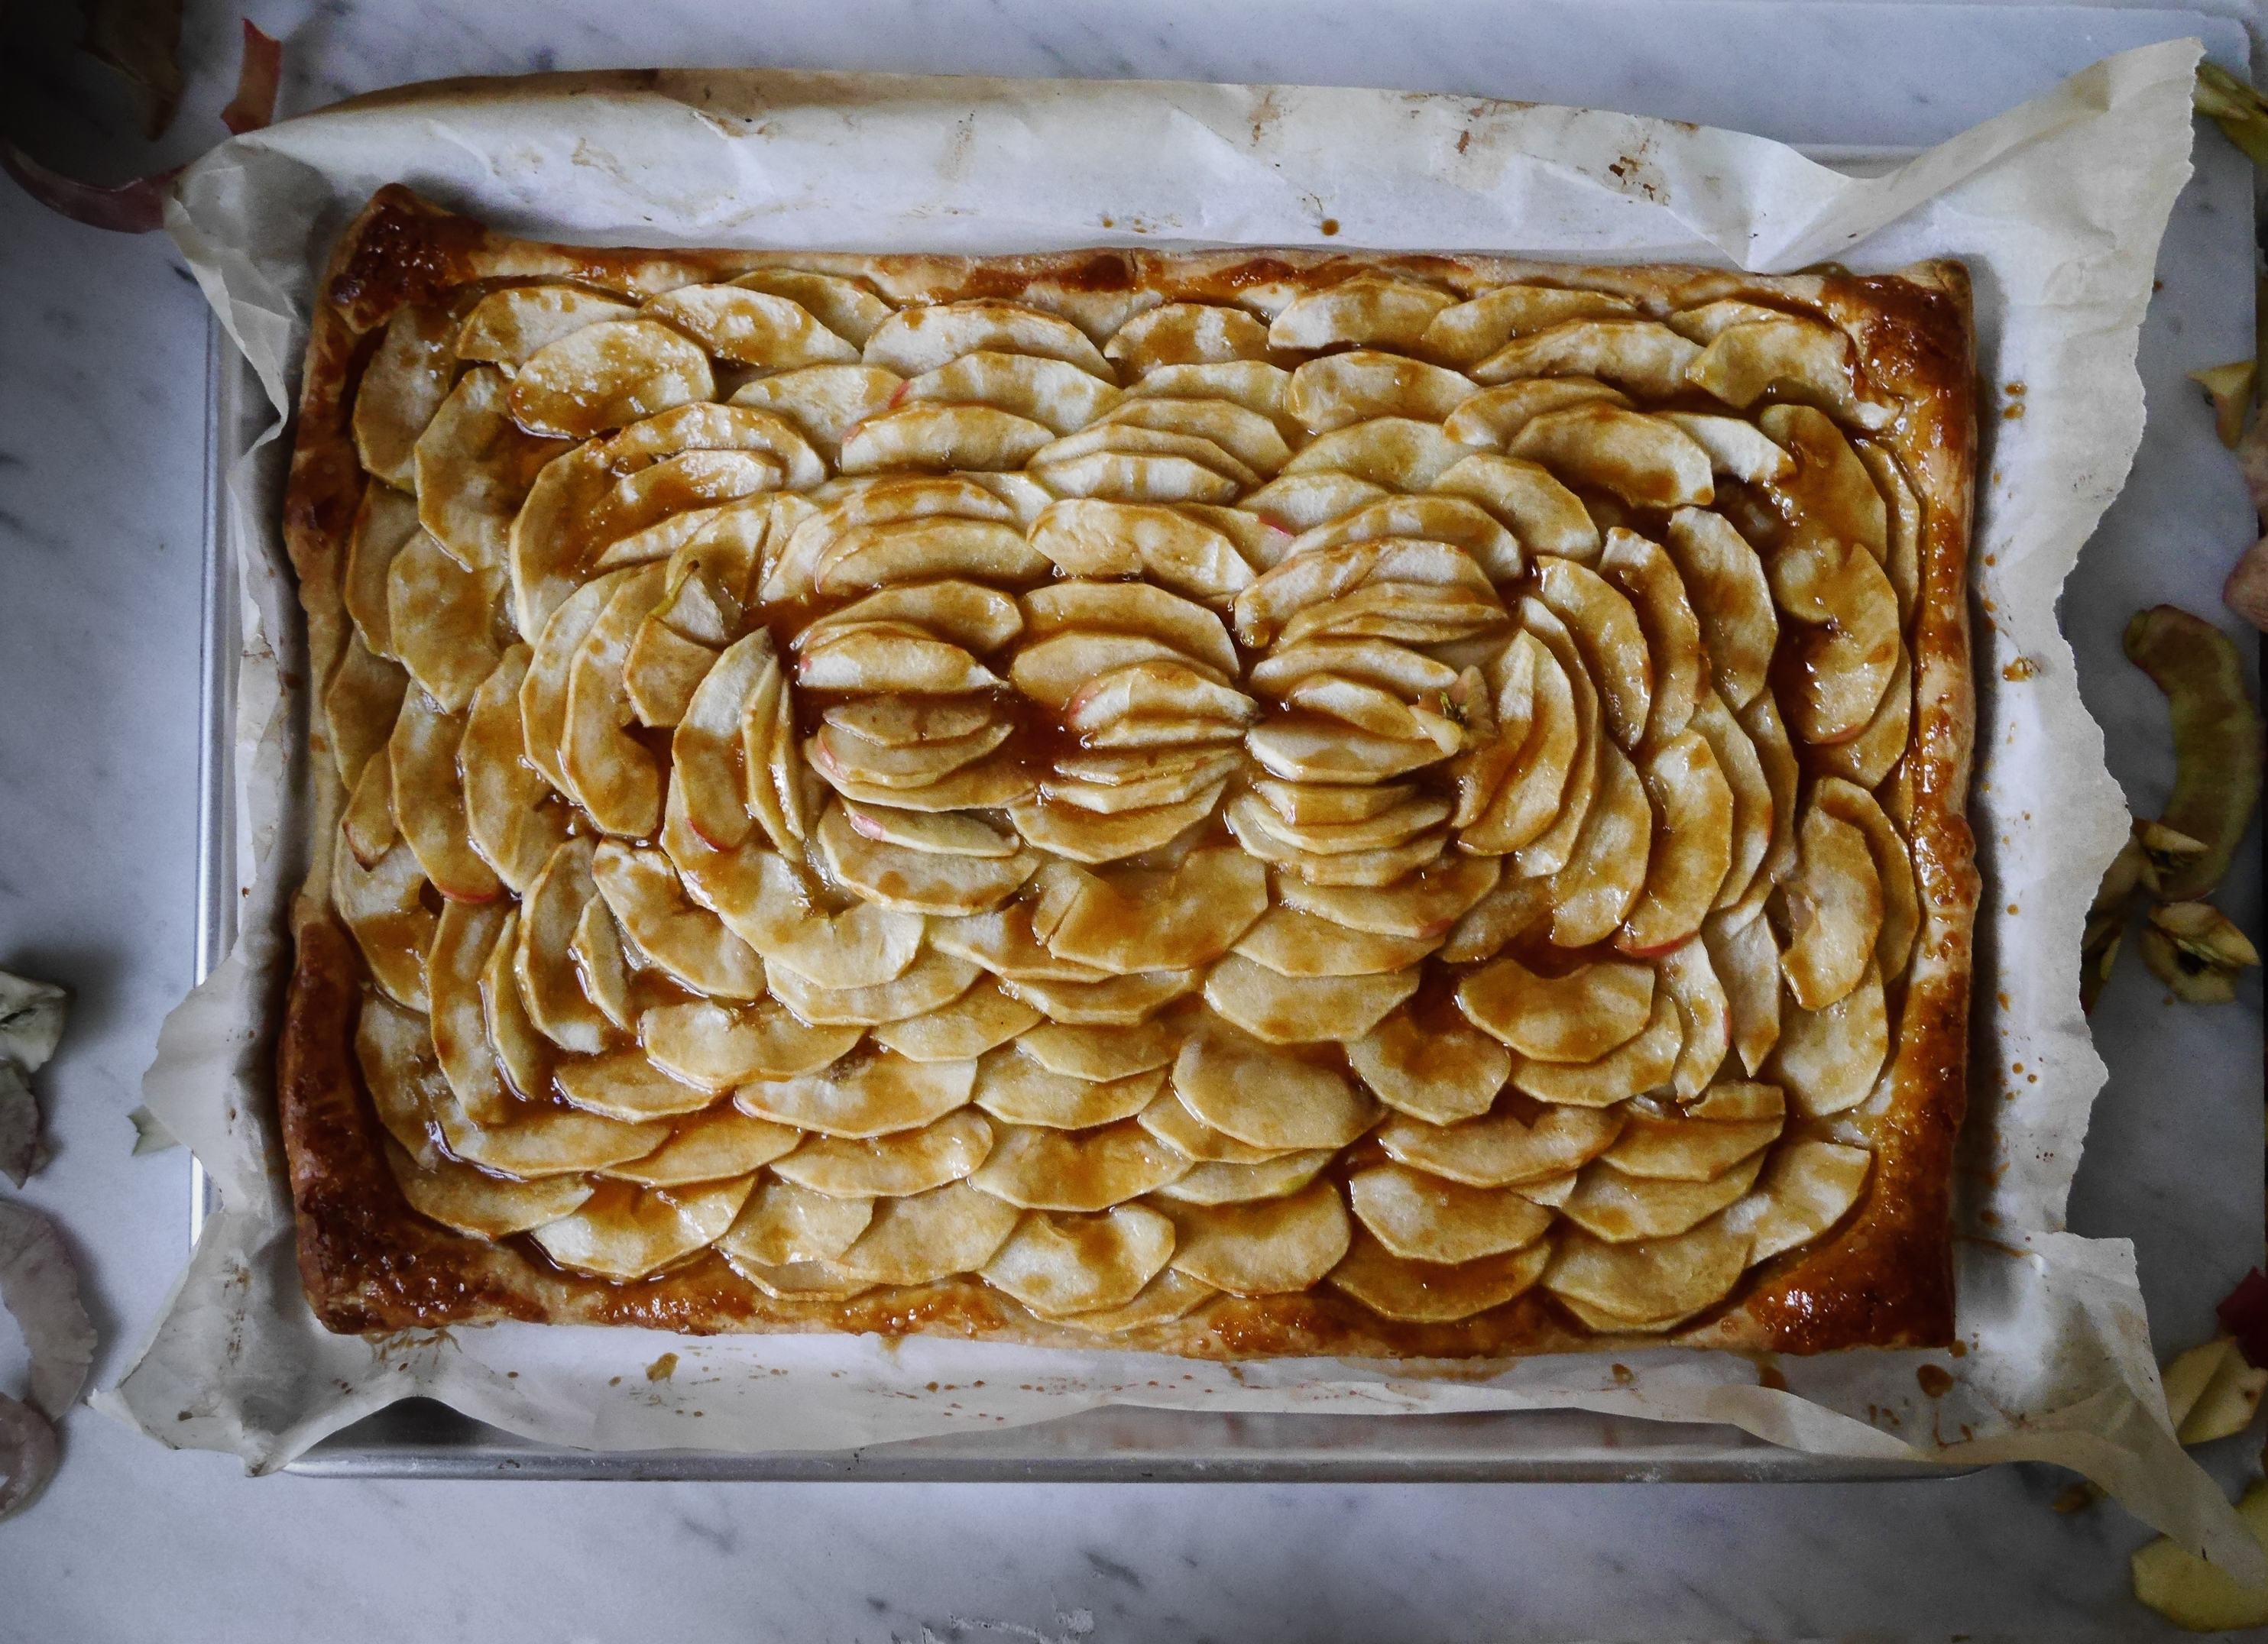
Layers of tart apples are piled onto buttery puff pastry, briefly baked, and then brushed with a salted caramel glaze. It’s dessert heaven, makes enough to easily feed 12 people, and is a showstopper when you bring it to a party (maybe unlike your last boyfriend, but no judgements).
Anyways, let’s talk about how easy this is:
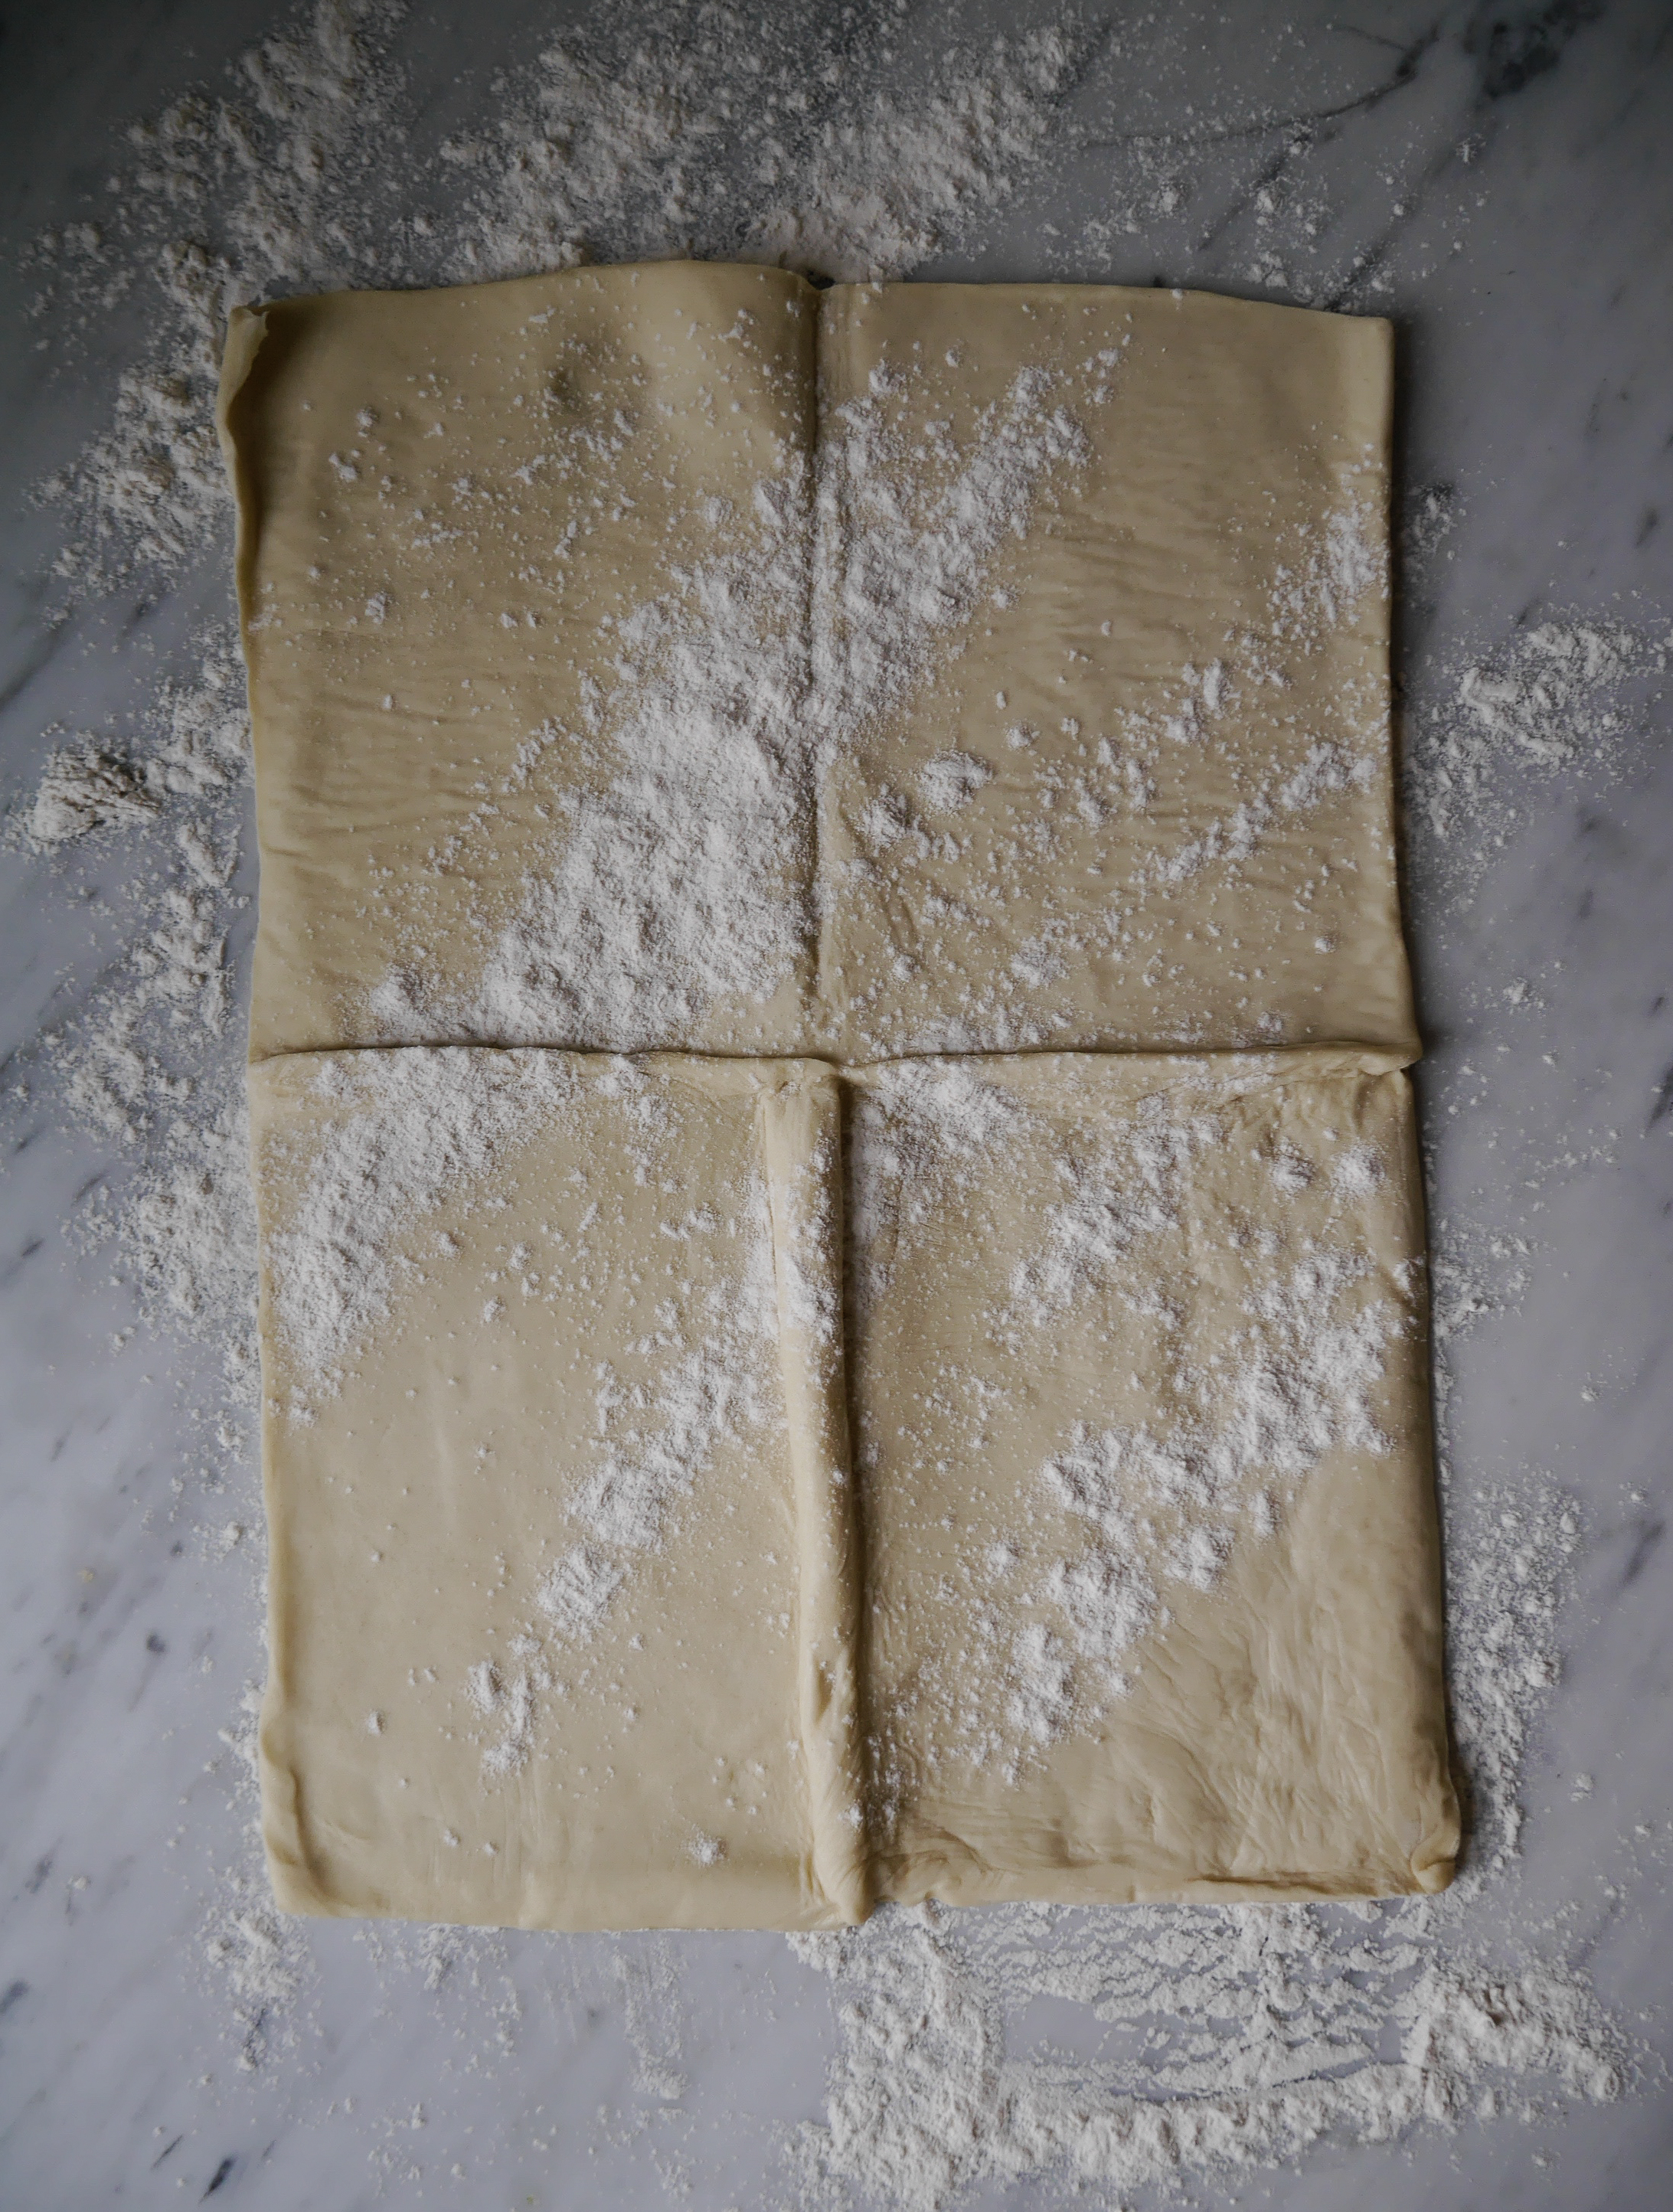
First off, you don’t even make the pastry. Go out to Whole Foods or your nearest grocery, look for DuFour puff pastry, or the best you can find. Deb recommends DuFour and now I know why. It’s the most buttery delicate thing I’ve ever tasted, and with only a few ingredients to the dessert, the quality really matters.
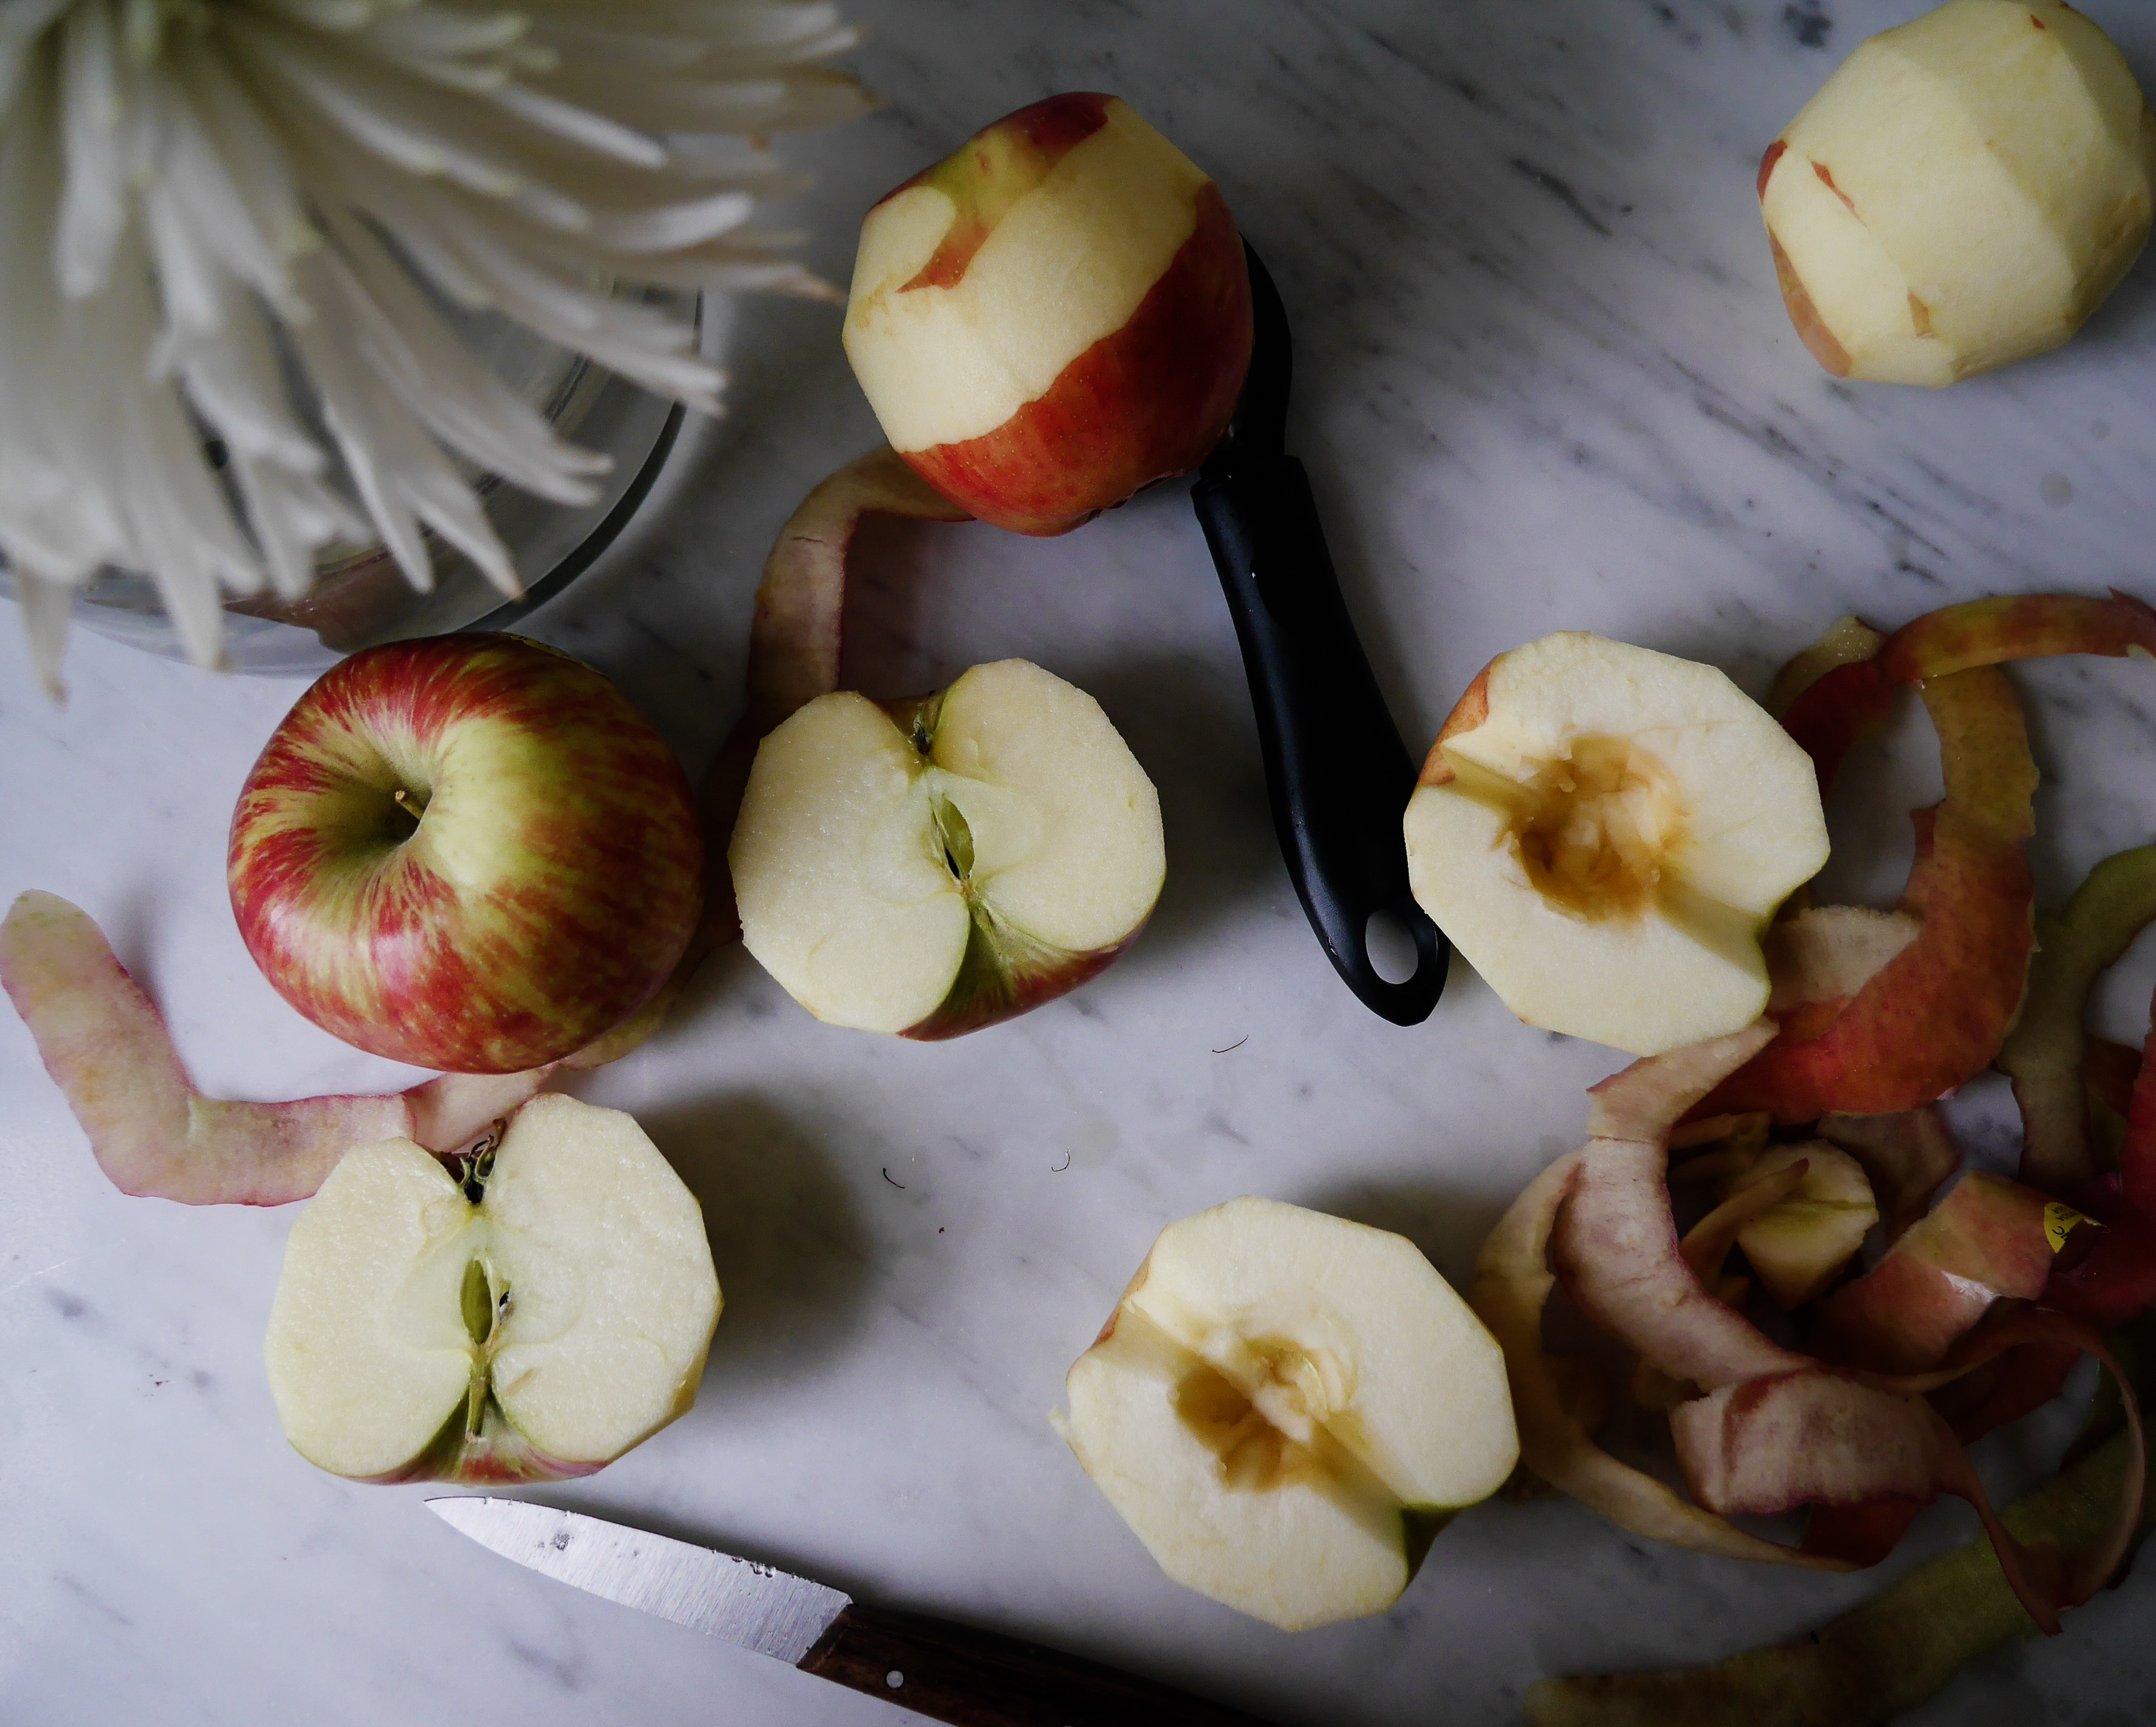

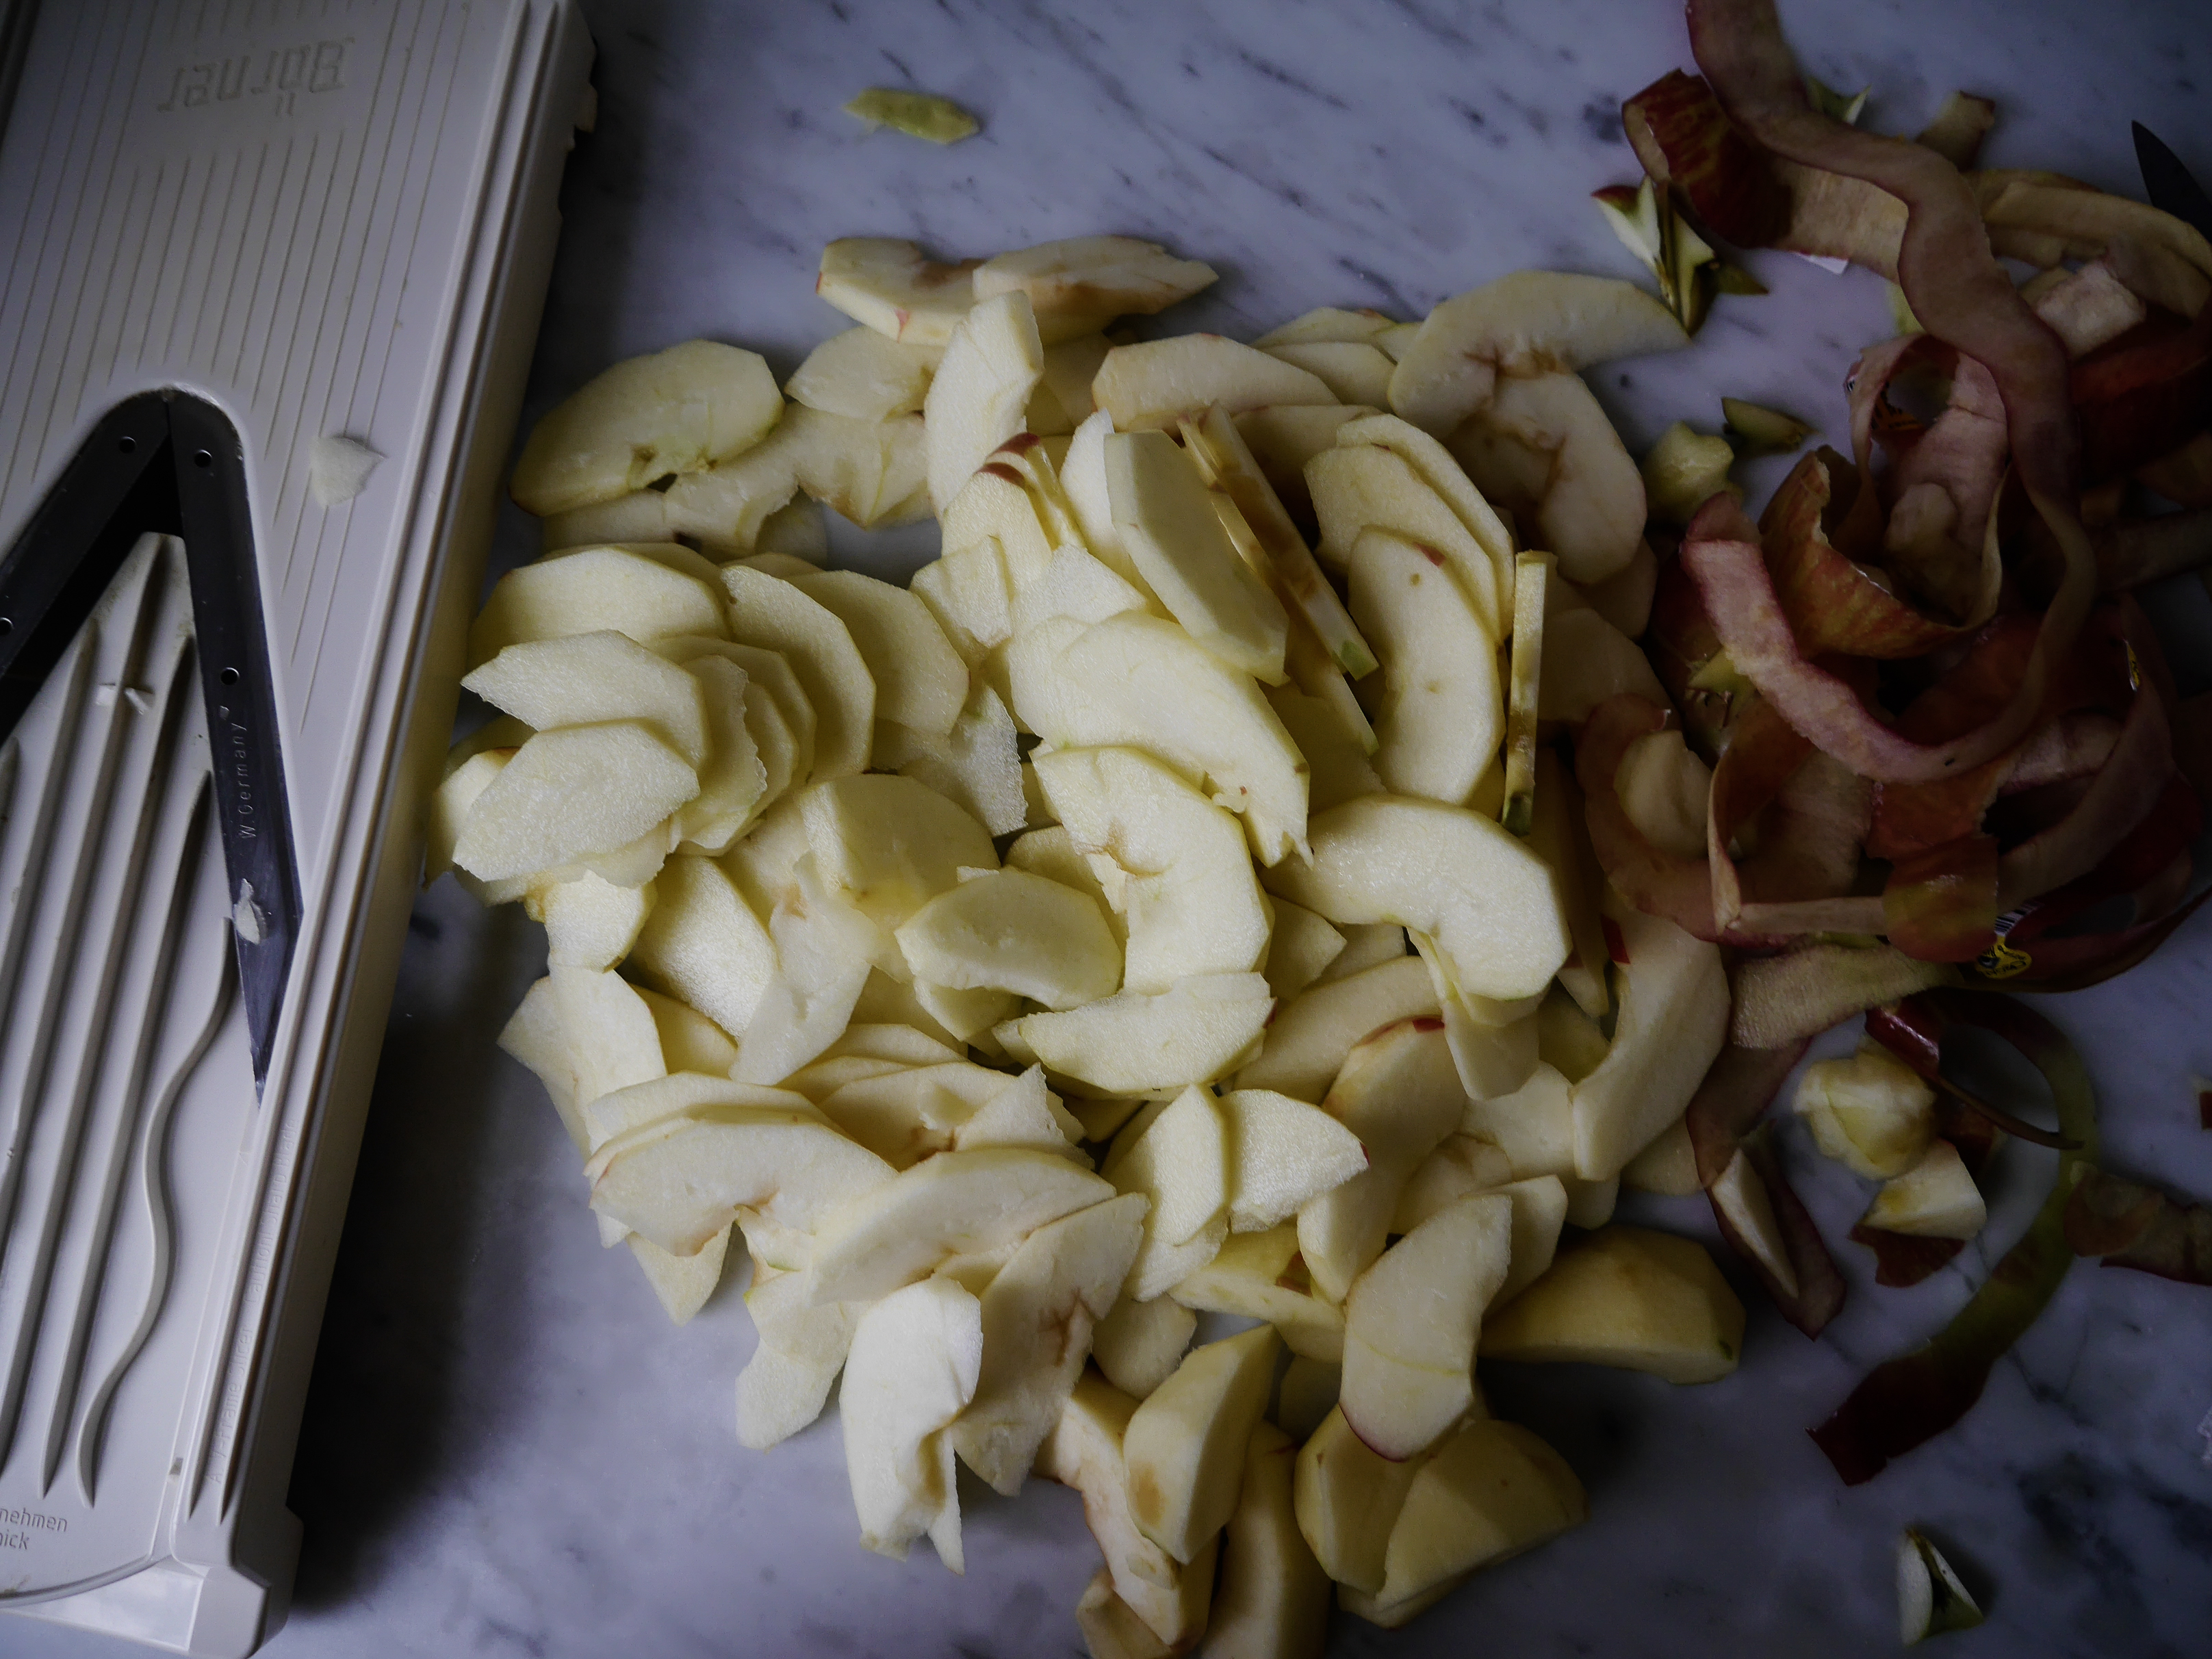
The most time consuming part of this dessert is peeling, coring, and slicing the apples. I’ve made this a few times and used a mandoline the first time, and hand chopped the second. I find pink lady’s work the best! They’re just the right combination of sweet and tart.
I didn’t find a huge time difference between the two, so if you’re like most people and don’t have a mandoline don’t fret!
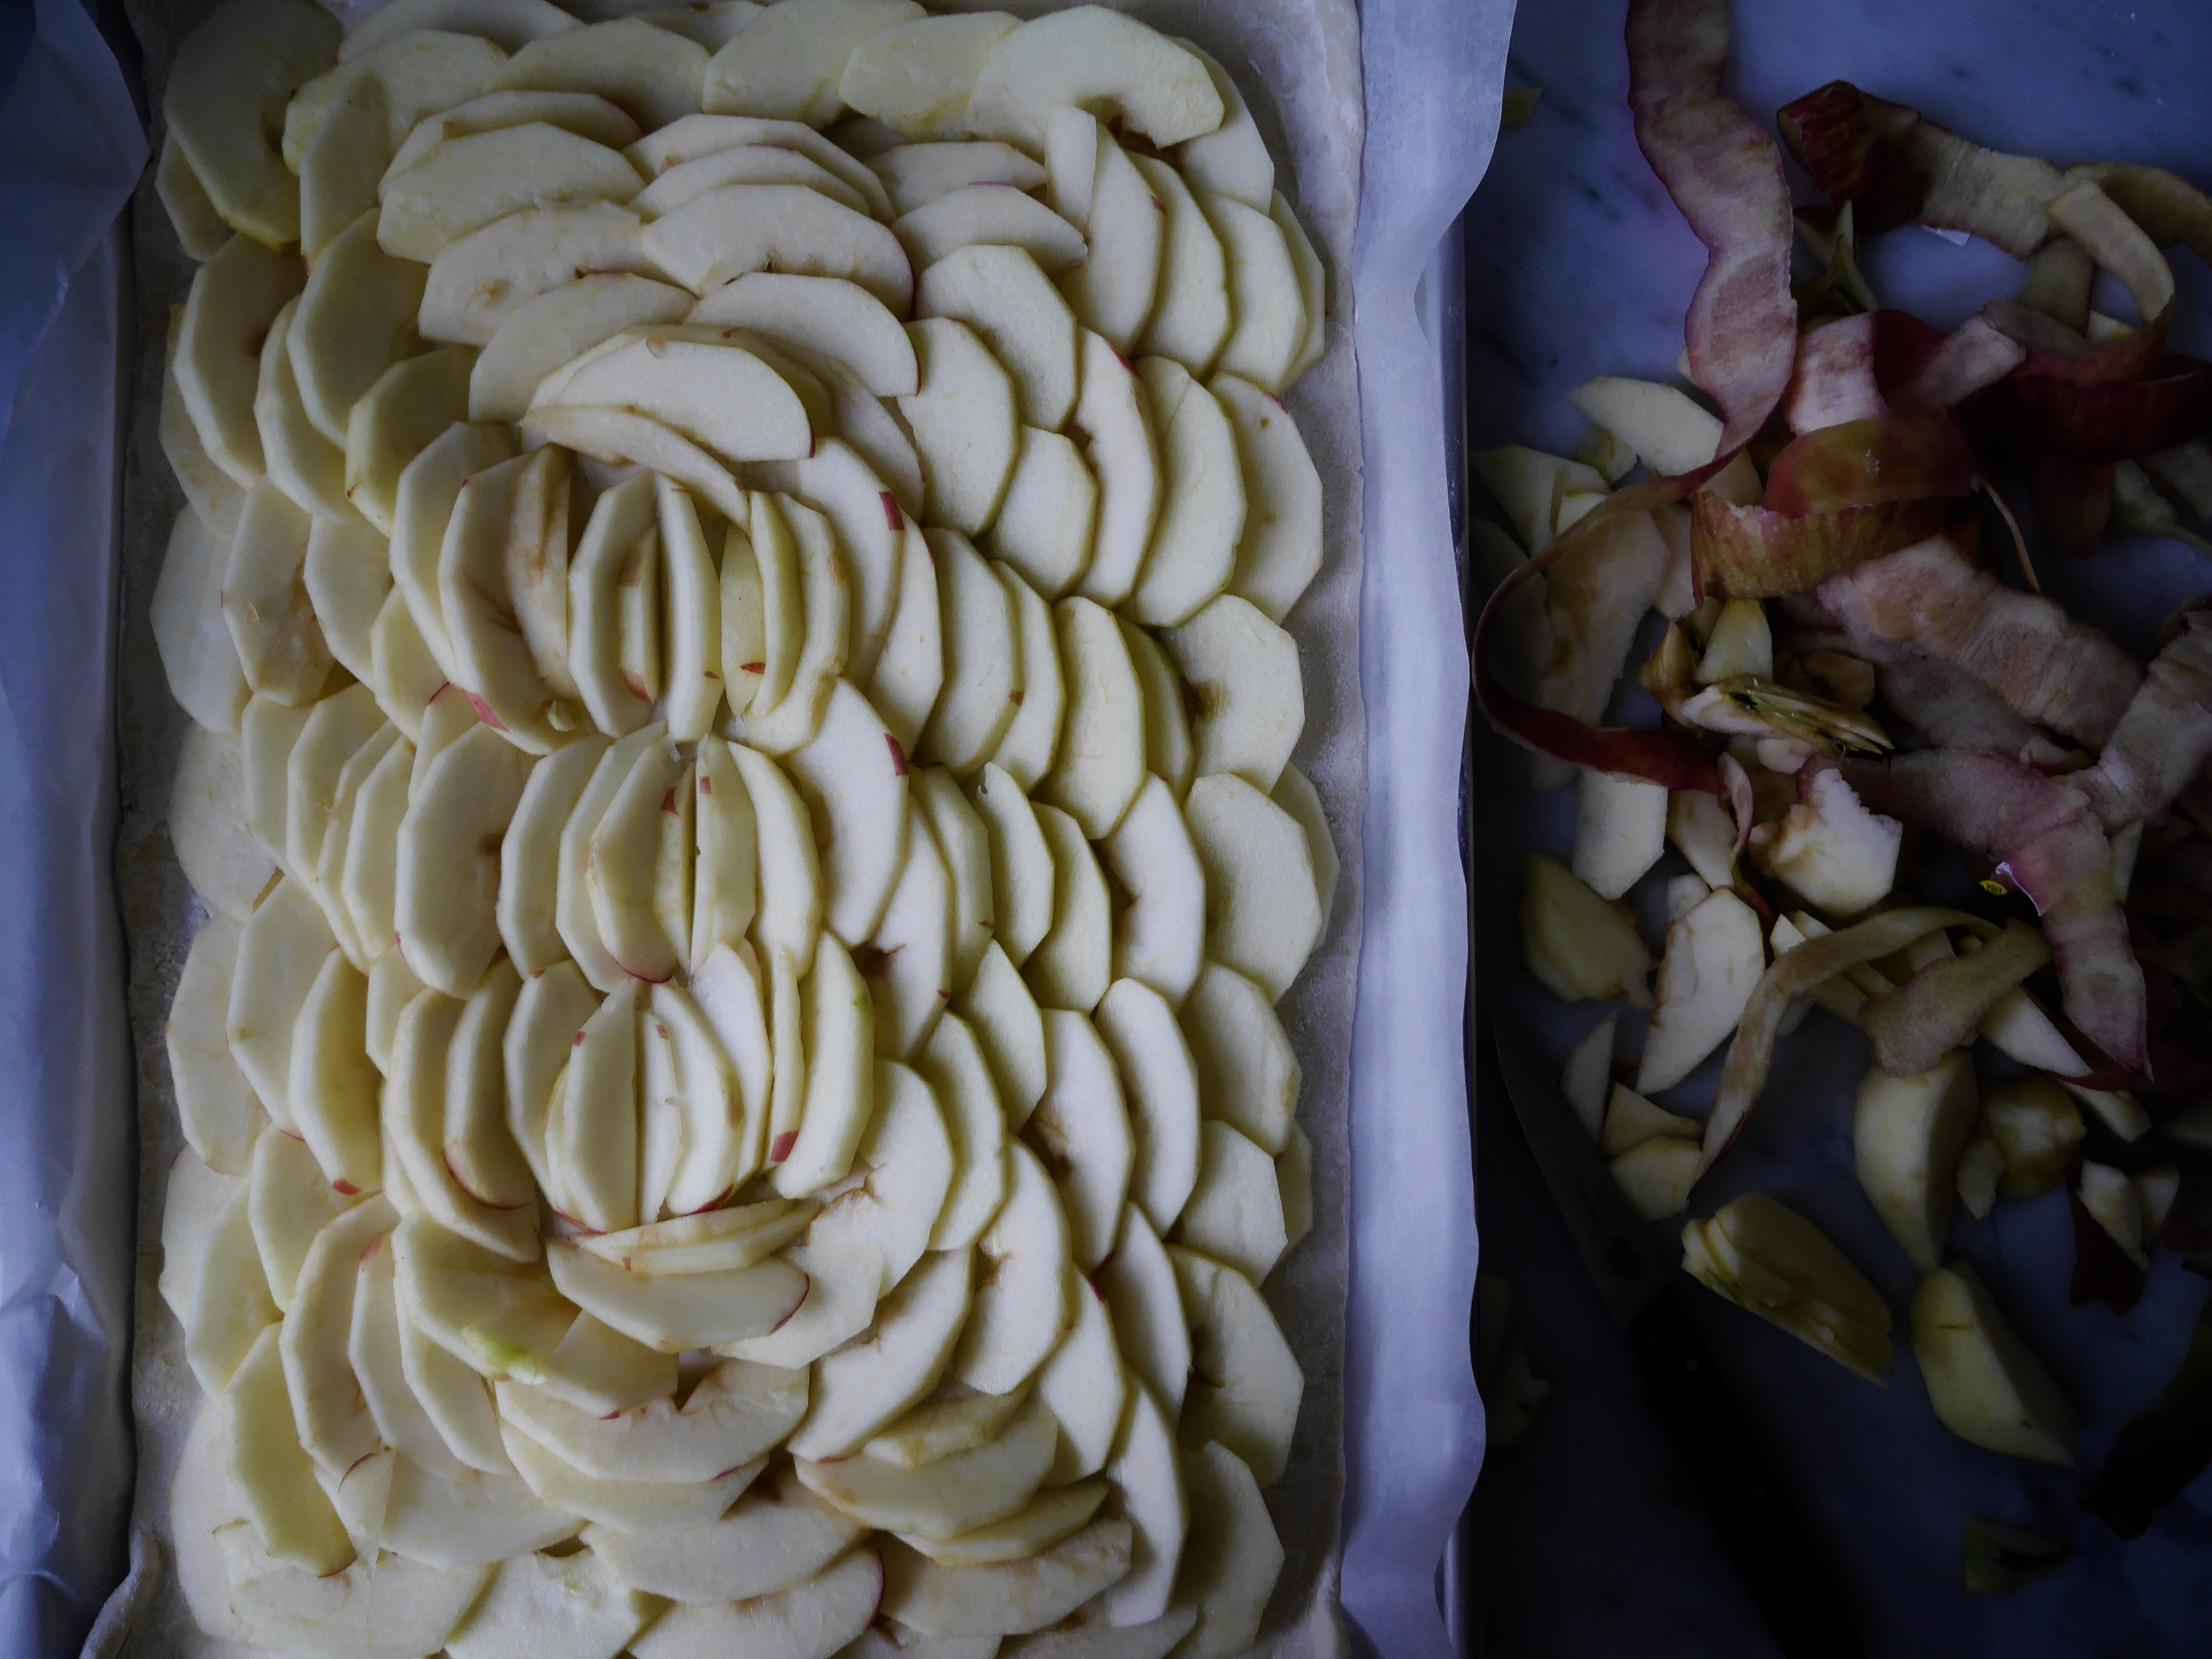
Now, arrange your apples overlapping slightly in coencentric circles until you get to the middle of the tart, leaving a half inch pastry border on all sides.
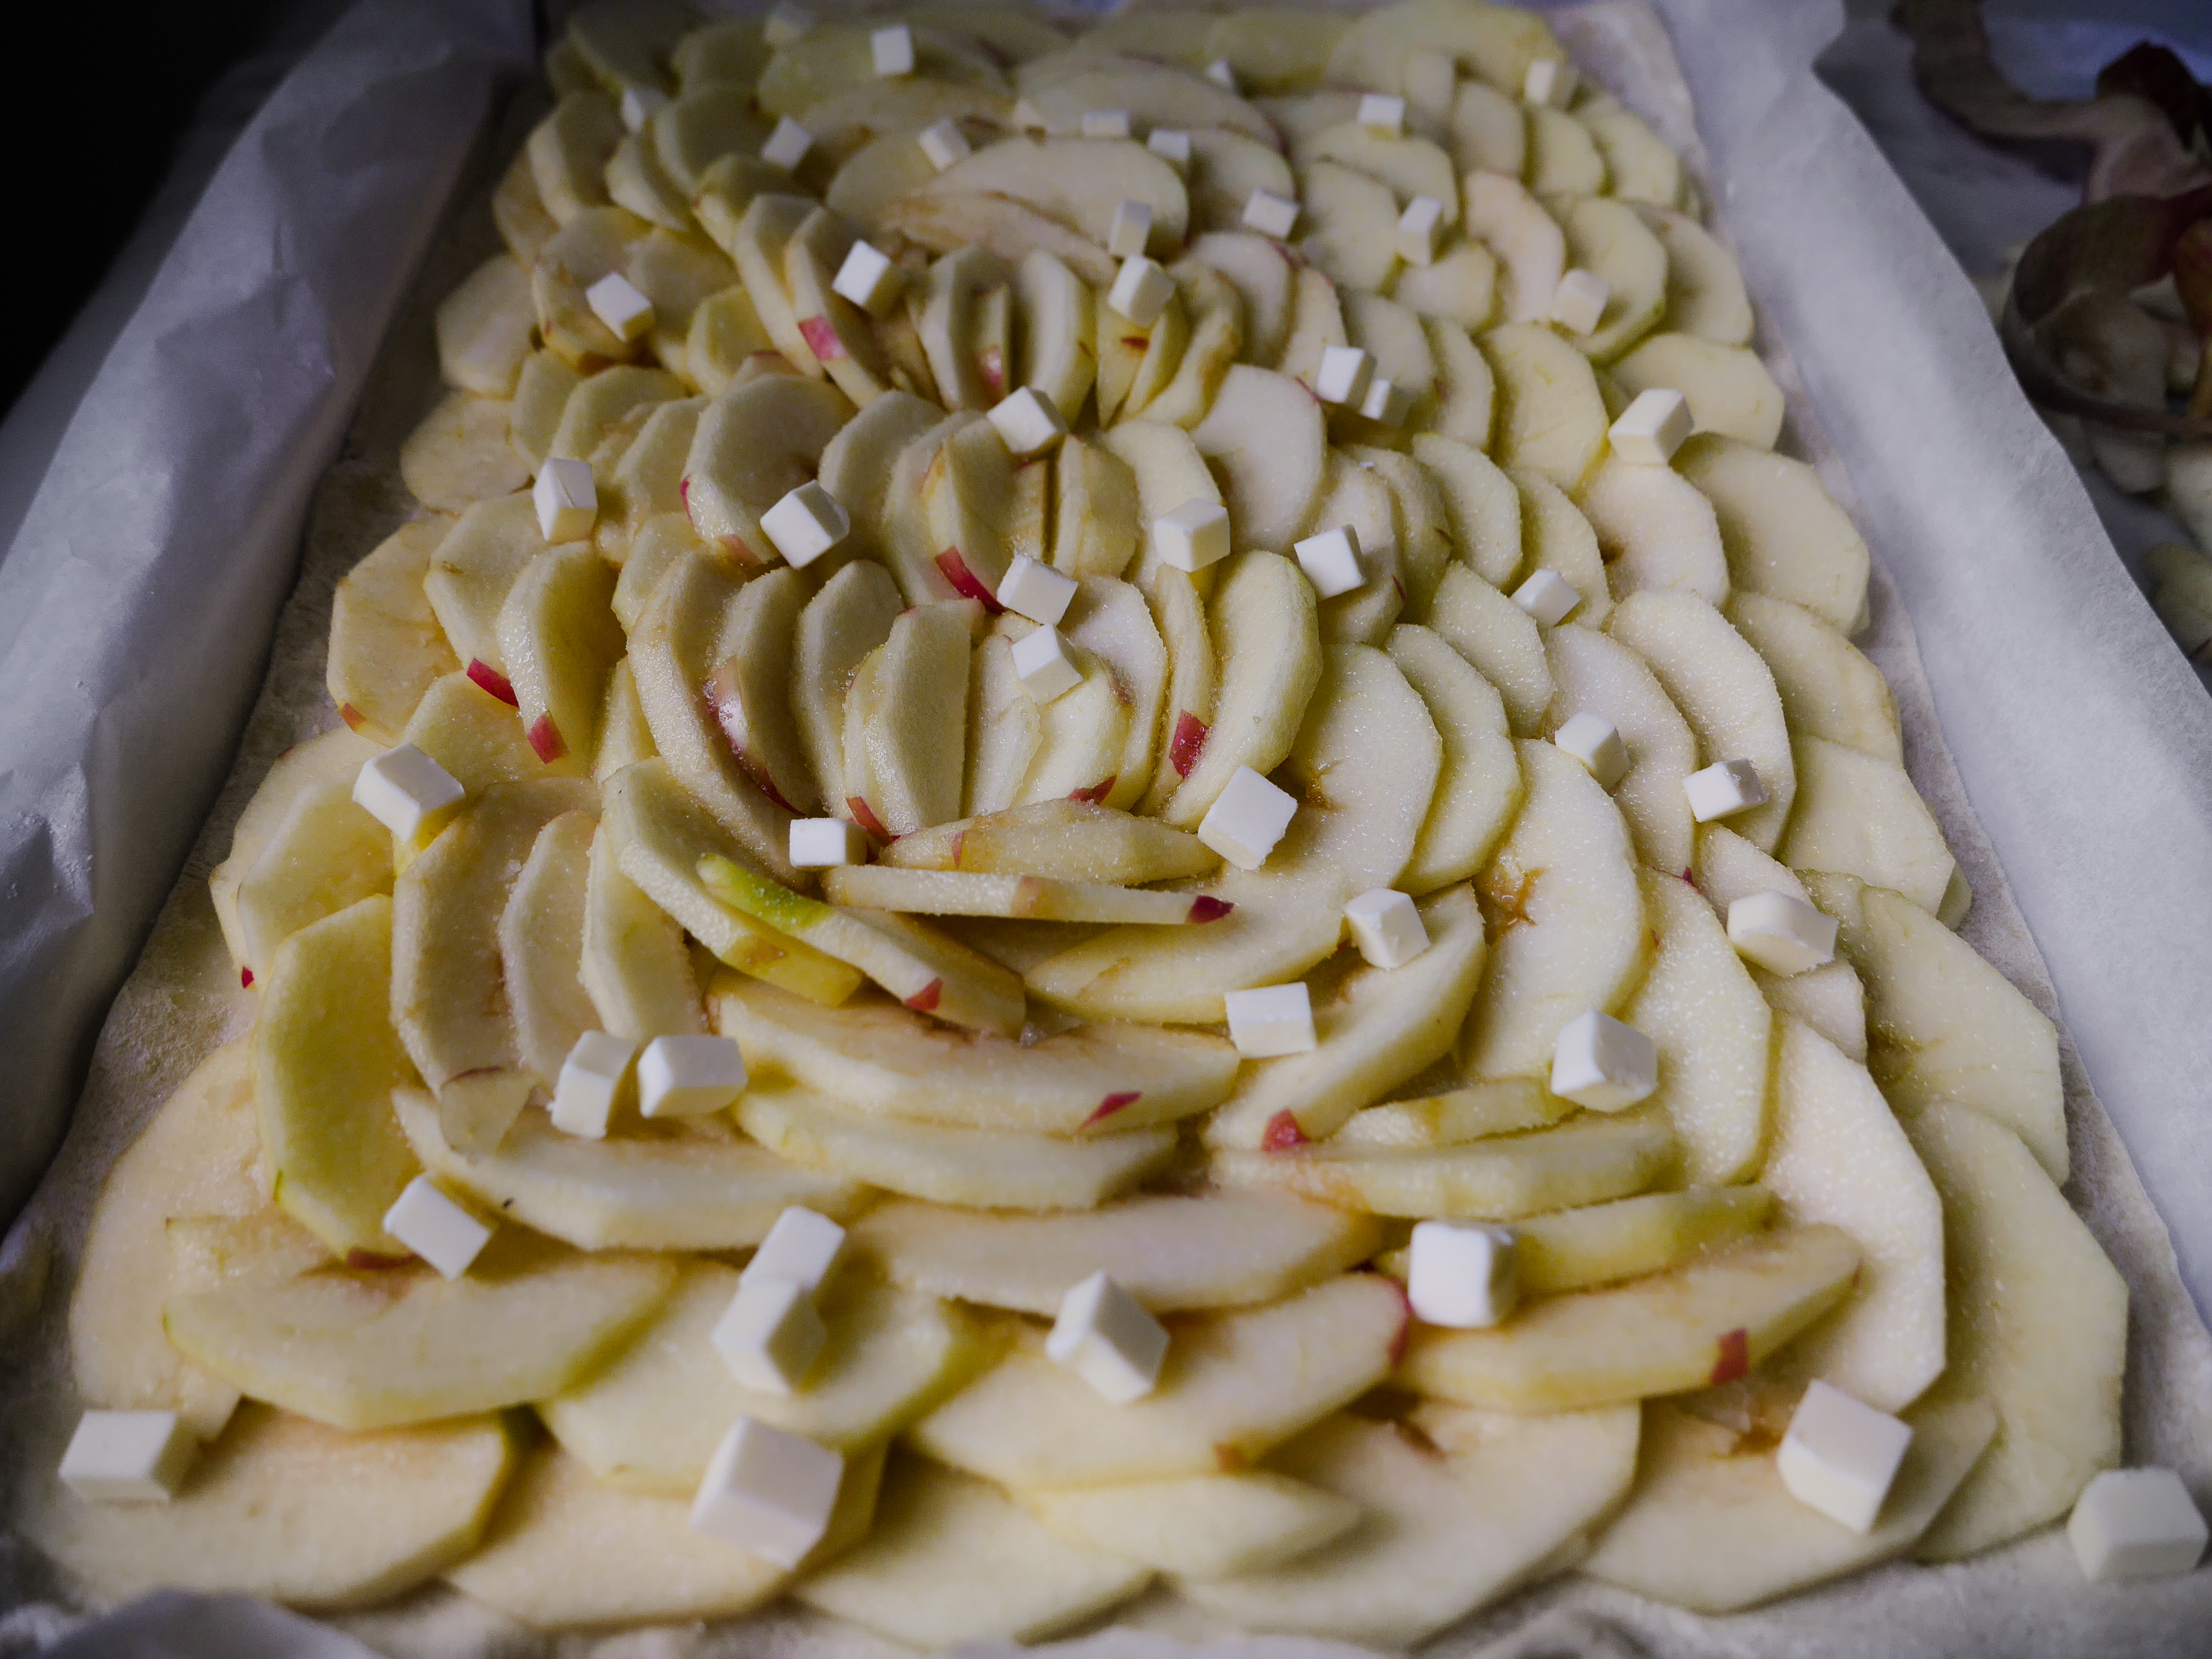
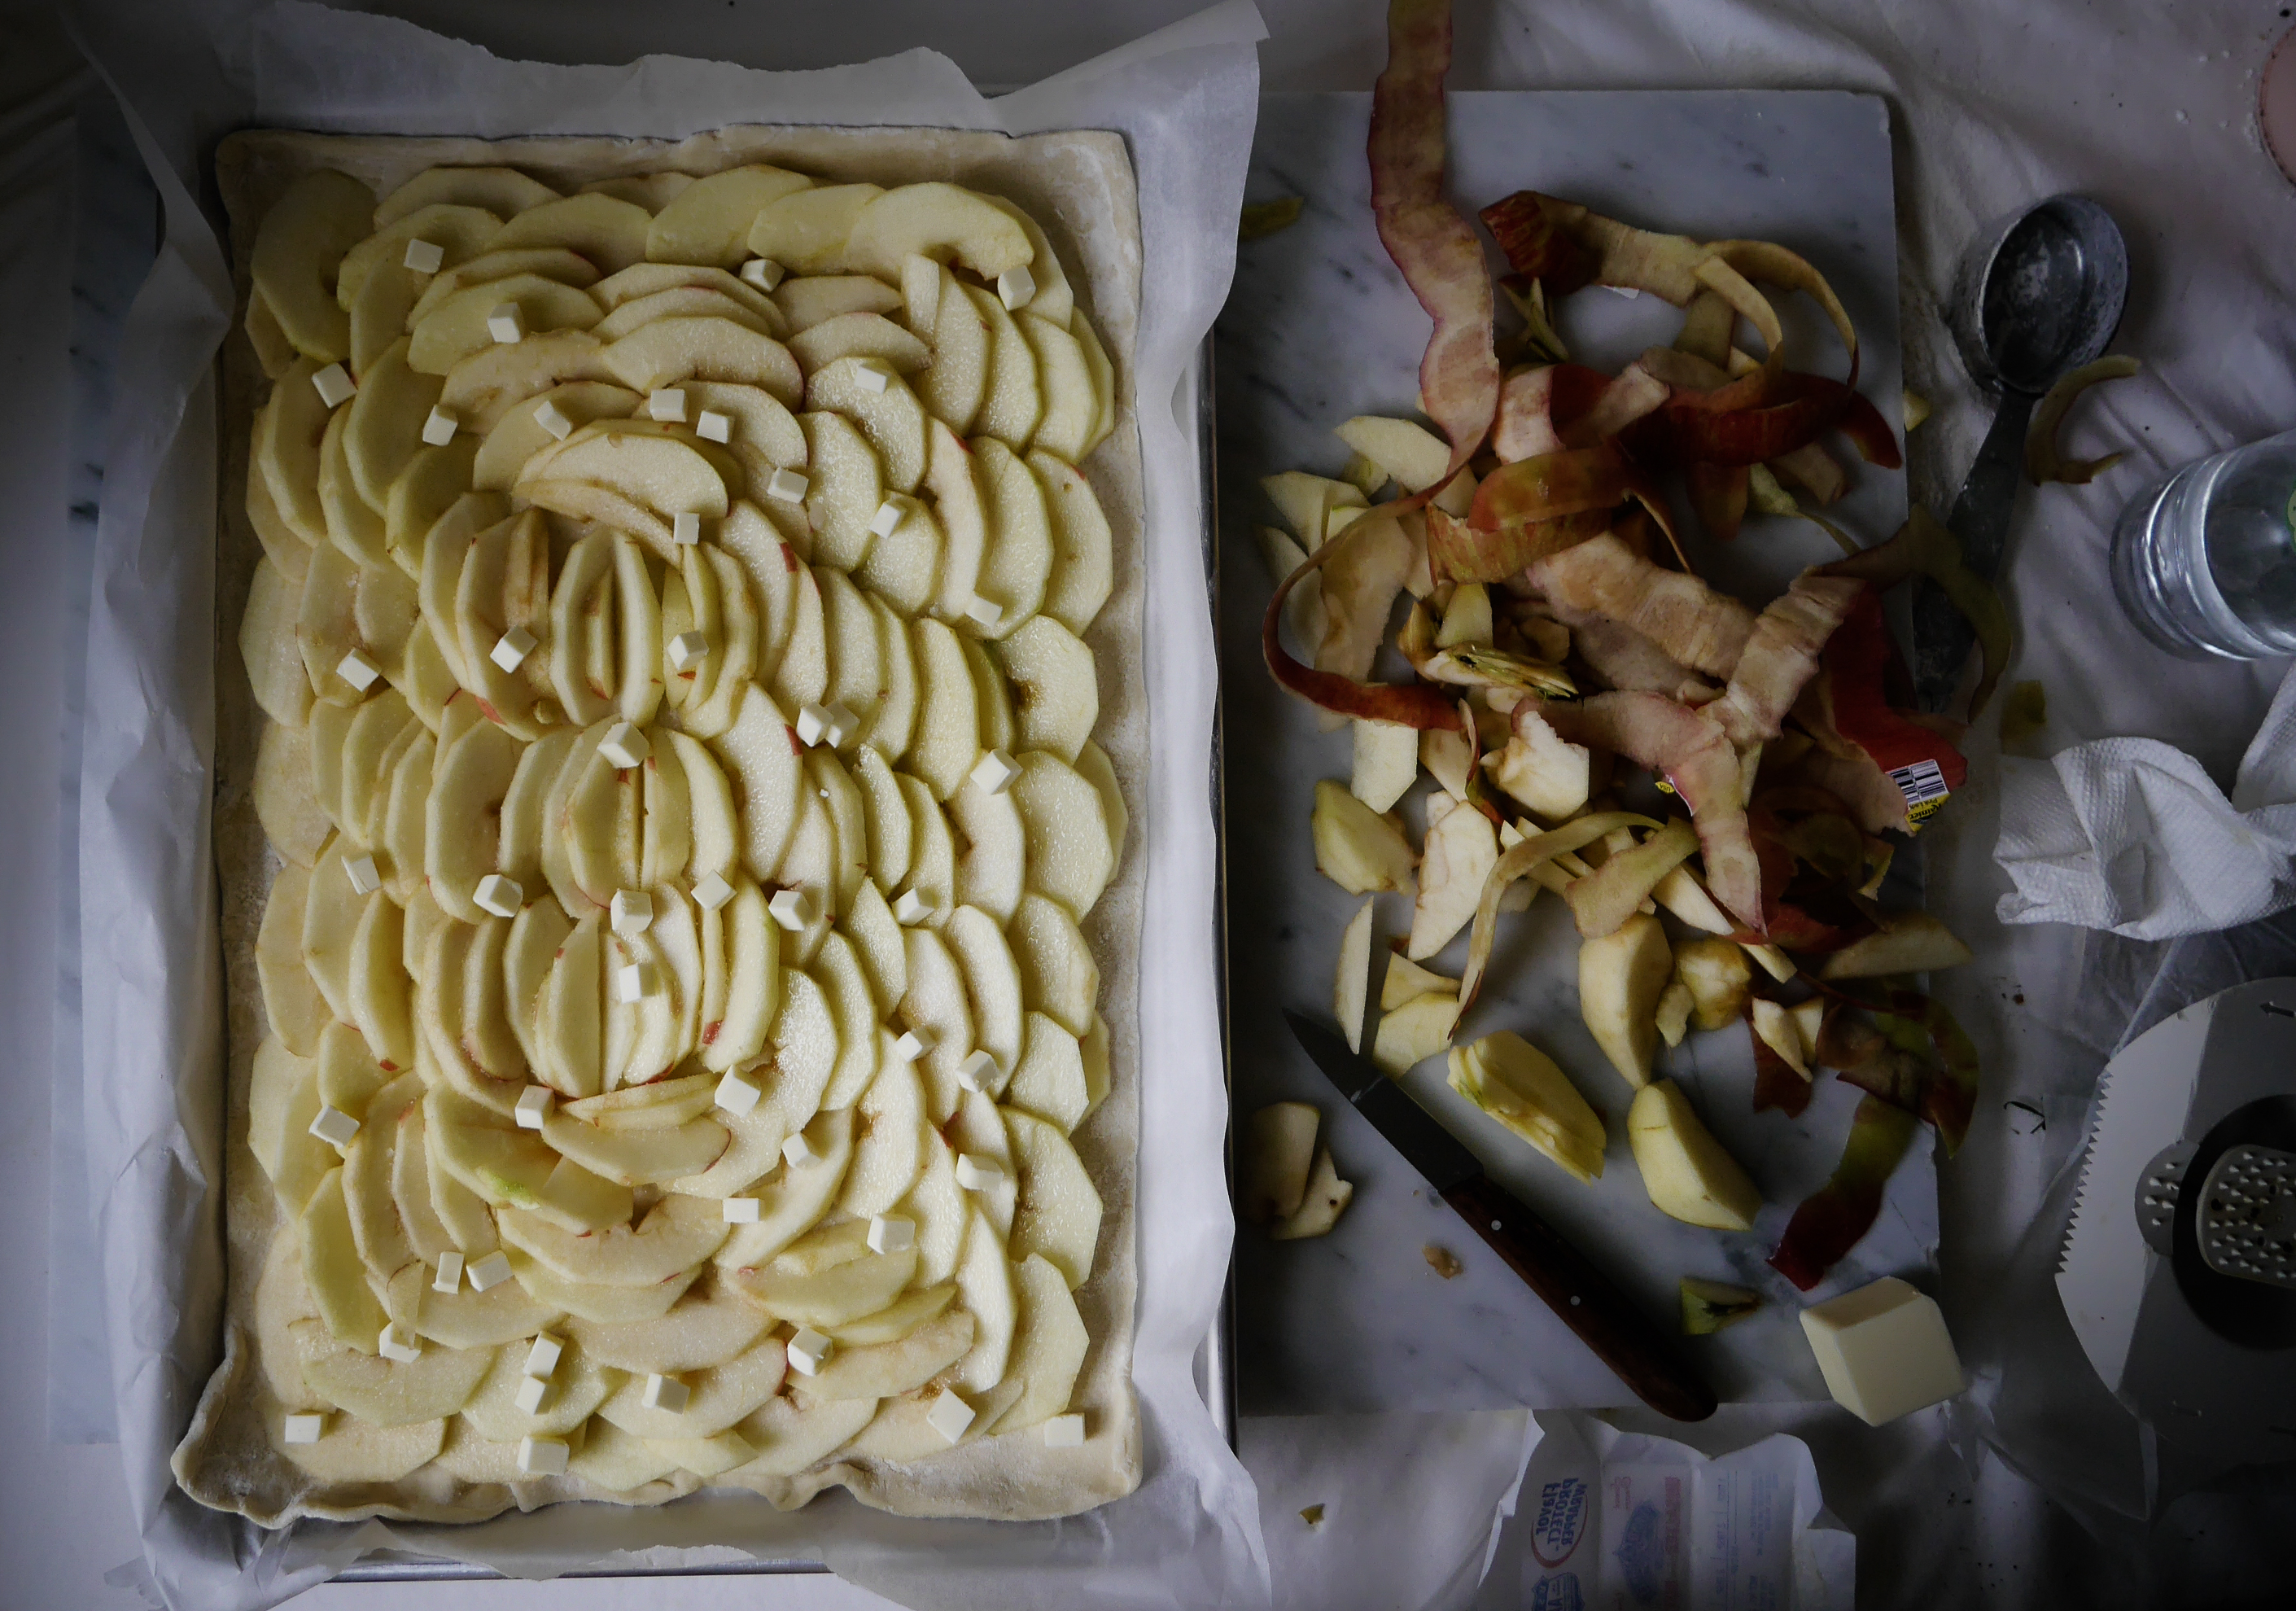
Dot with butter and sprinkle with sugar, and pop in the oven for 30 minutes, which gives you plenty of time to make your glaze!
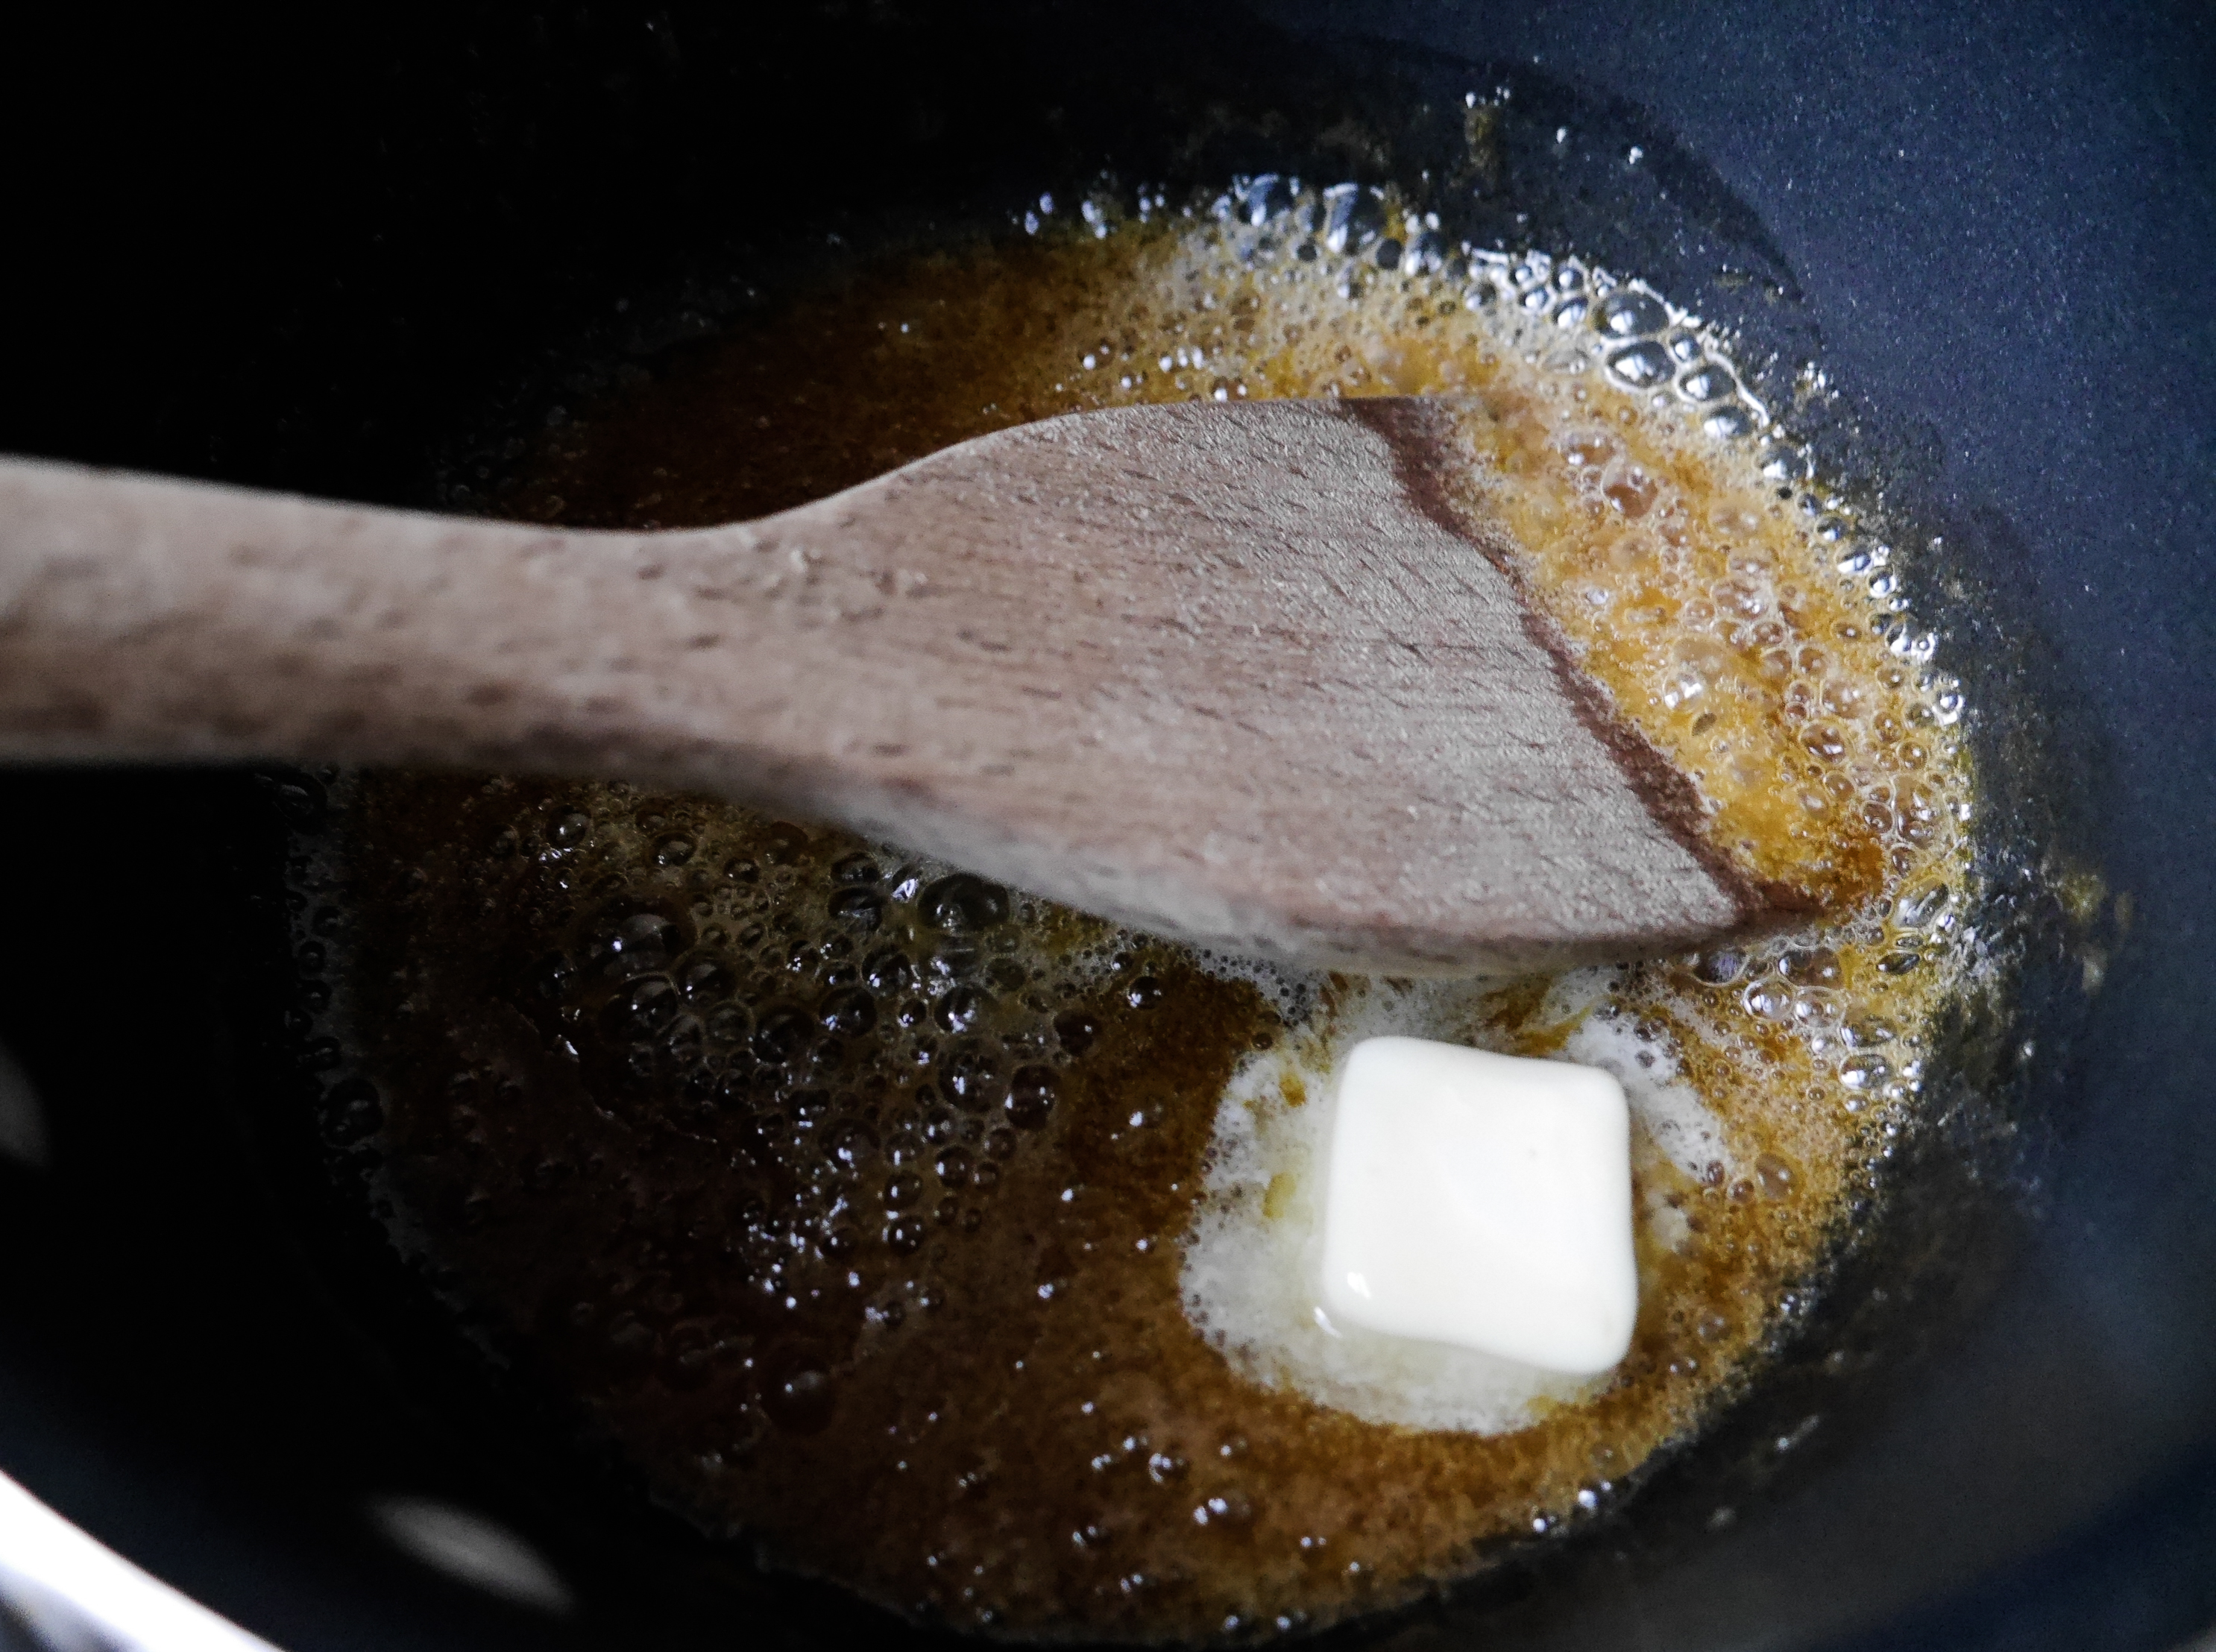
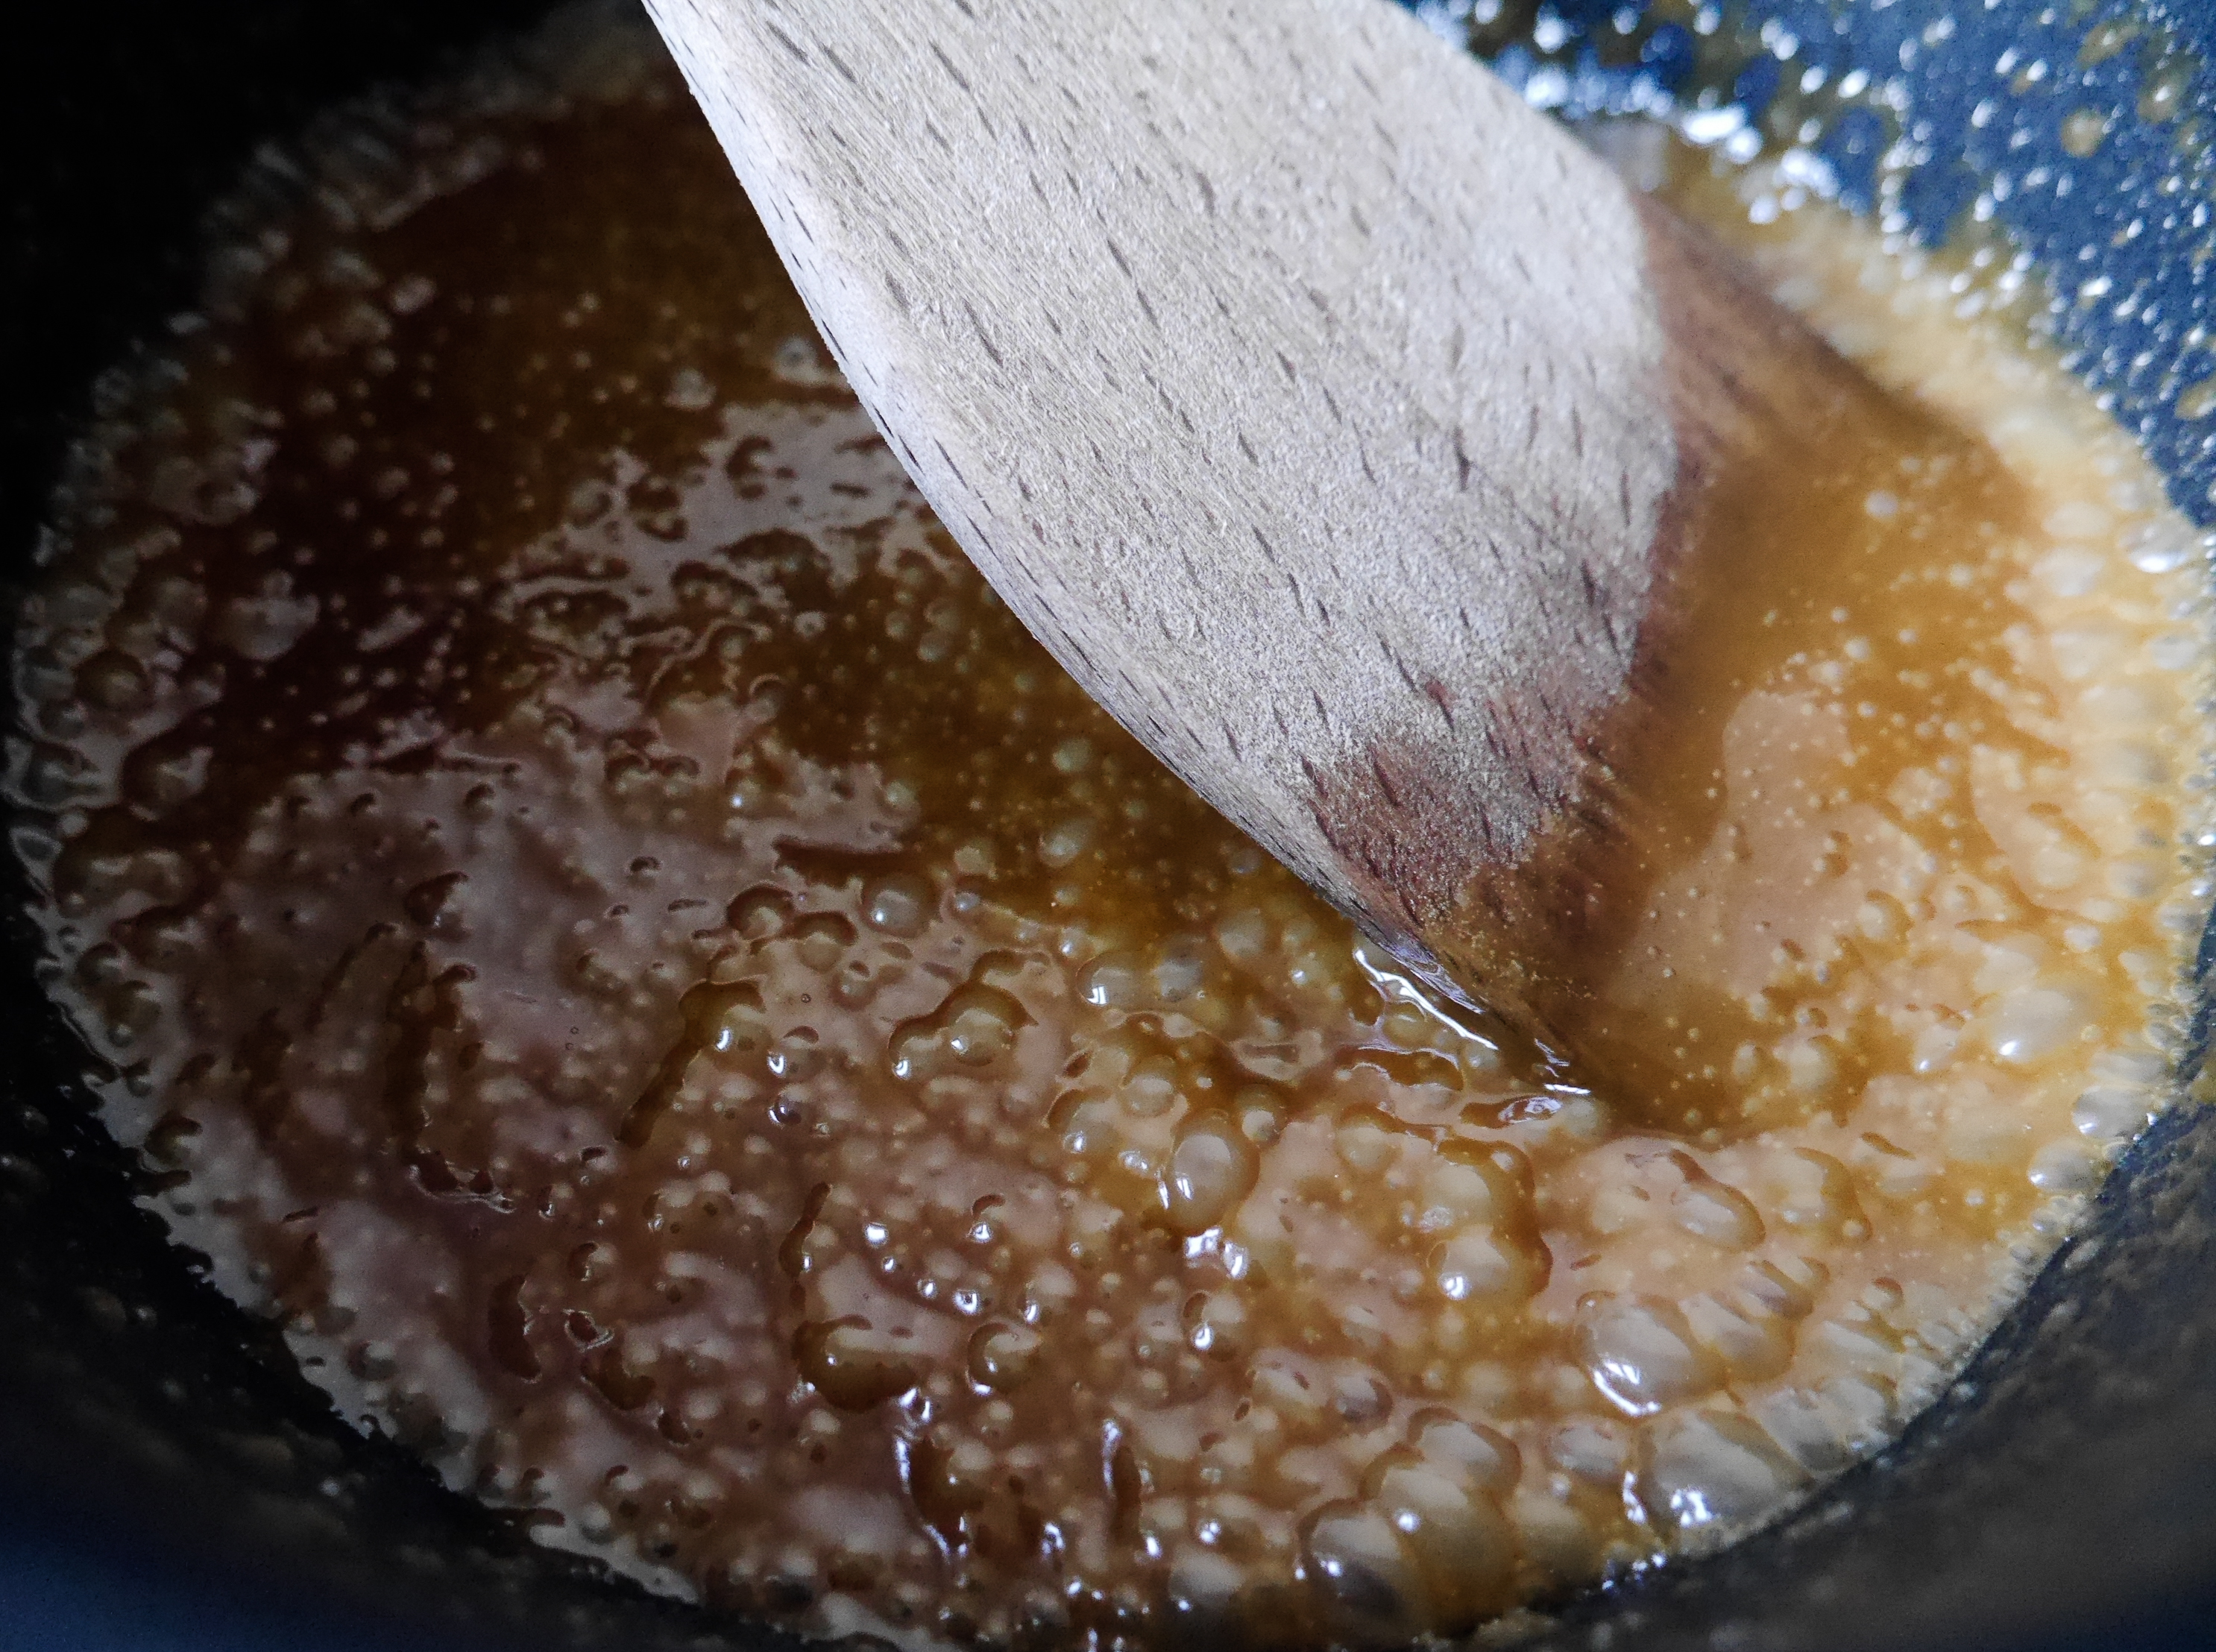
In a saucepan over medium heat, melt sugar until beautifully bronze in color. Keep a very close eye on this (stay off instagram!) because it can burn very easily.
Once the sugar is melted, add in butter, cream, and a good pinch of salt. Stir until combined.
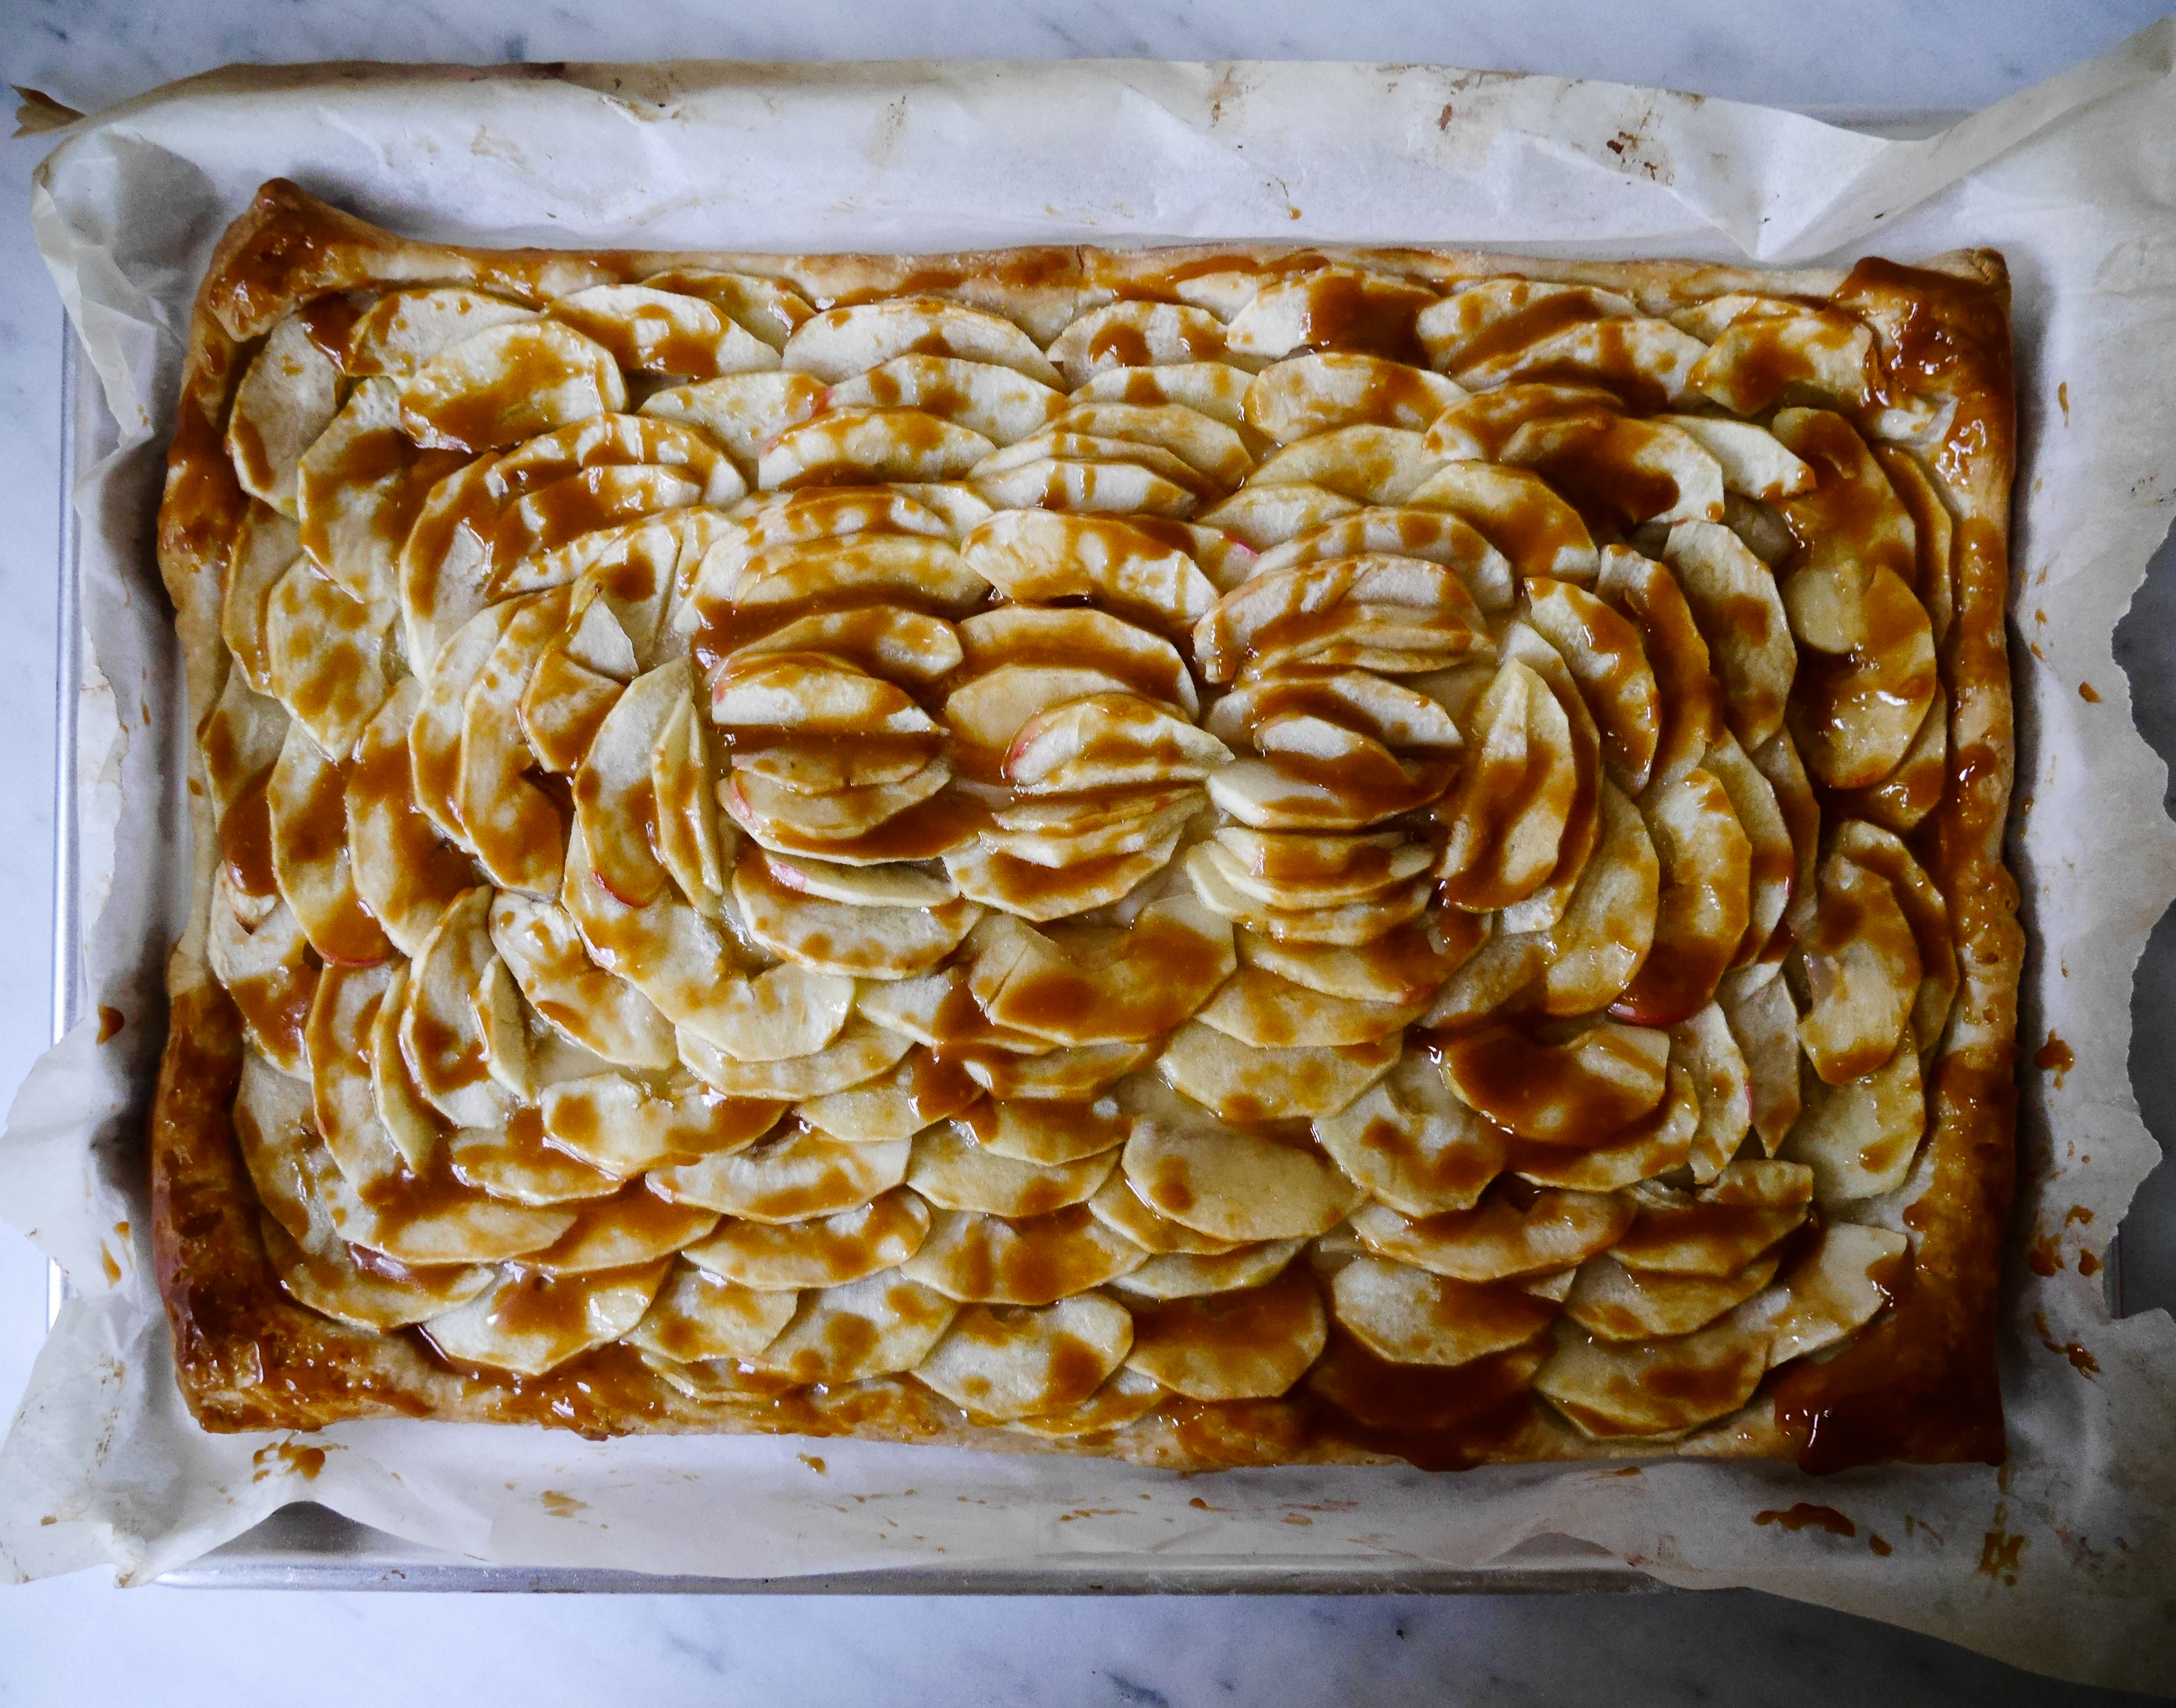
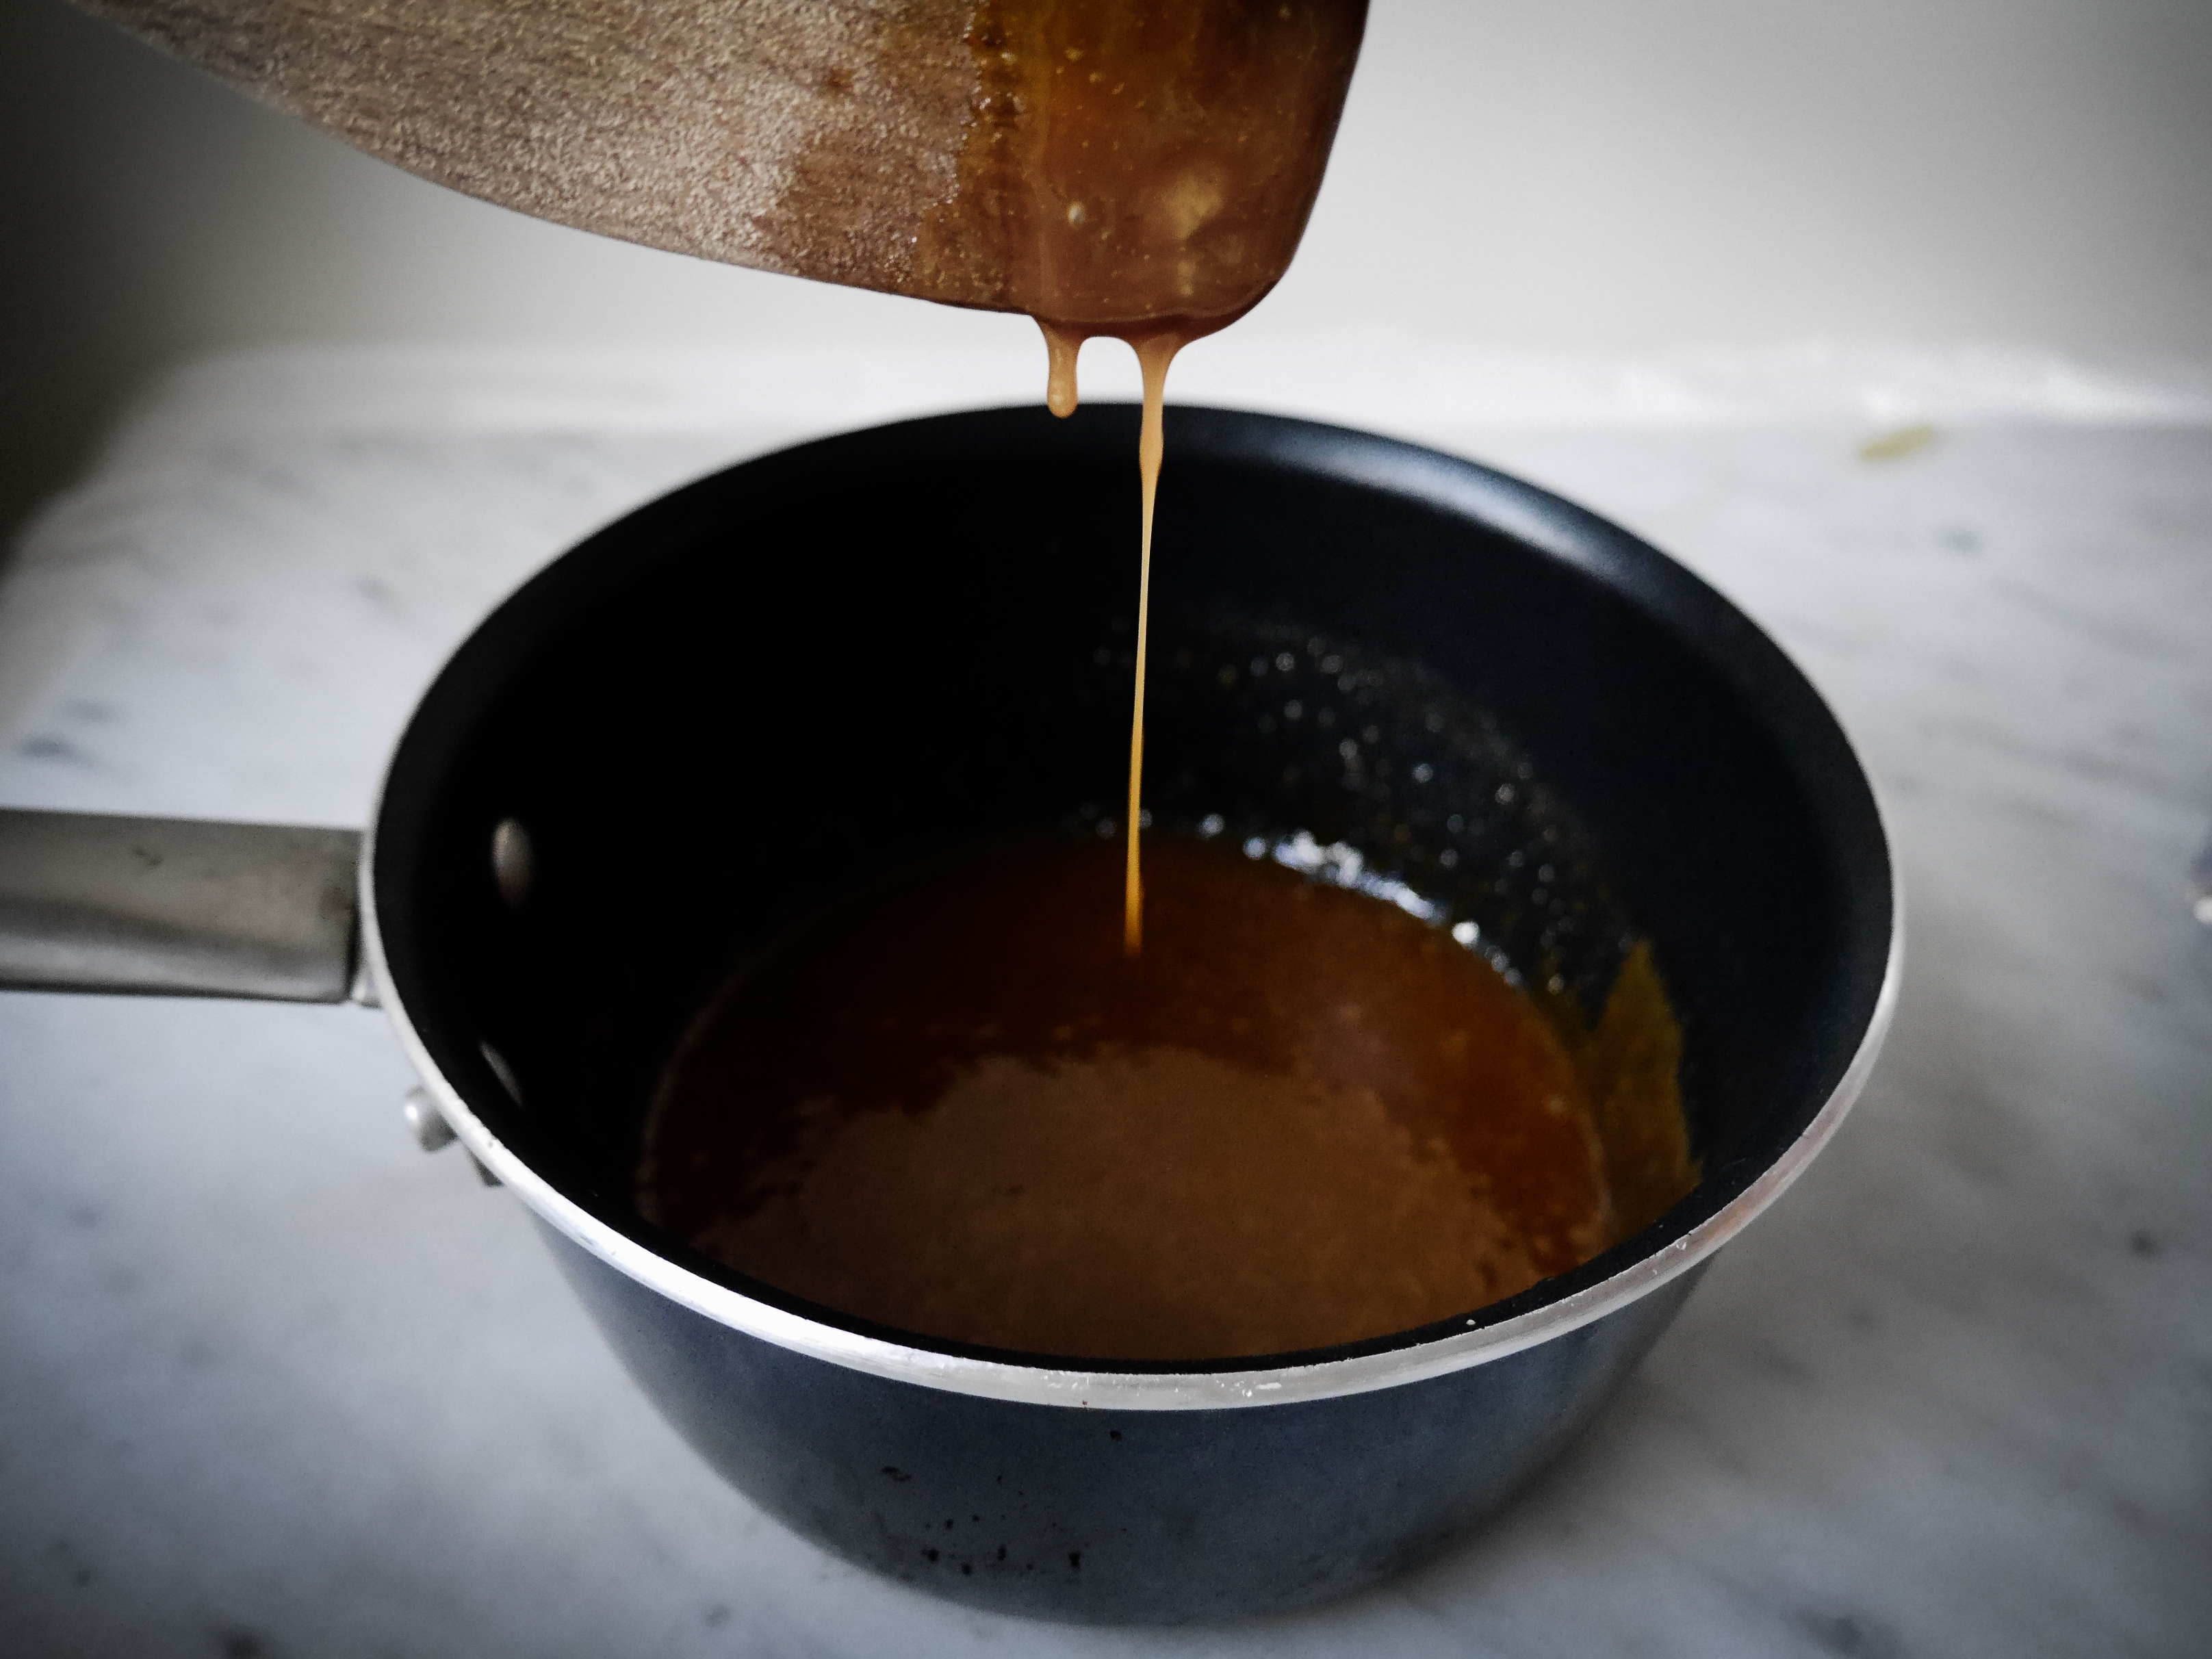
Take that gorgeous tart out of the oven, brush on the glaze, and return to the oven for a few more minutes, or until the glaze is bubbling.
When I made this ahead of time for a dinner party, I did the first bake of the tart that morning, and then did the second bake with the glaze right before we ate dessert so it was still warm. Serve with a generous scoop of ice cream and cheers to the holiday weight gain! I mean, cheers to the holidays 🙂
I would write out the recipe for you guys, but honestly it needed no adjustments, and I love the way Deb phrases everything. So, below is the recipe copy and pasted from Smitten Kitchen:
Tart base
- 14-ounce package puff pastry, defrosted in fridge overnight
- 3 large or 4 medium apples (about 1 1/4 pounds)
- 2 tablespoons granulated sugar
- 2 tablespoons unsalted butter, cold, cut into small bits
Salted caramel glaze
- 1/4 cup granulated sugar
- 2 tablespoons unsalted butter (or salted, but then ease up on the sea salt)
- 1/4 teaspoon flaky sea salt (or half as much table salt)
- 2 tablespoons heavy cream
Heat your oven to 400°F. Line a rimmed baking sheet or jelly roll pan with parchment paper. Ideally you would use a 10×15-inch jelly roll pan, as I do here. A smaller pan will make a thicker tart (and you might need fewer apples). In a larger pan, you can still fit a 10×15-inch tart, which I think is the ideal size here.
Lightly flour your counter and lay out your pastry. Flour the top and gently roll it until it fits inside your baking sheet, and transfer it there. Try not to roll it any bigger than you’ll need it, or you’ll have to trim, which means you’ll have to sprinkle the trimmings with cinnamon-sugar and bake them into cookie-sized segments for snacks. And that would be terrible.
Peel the apples and cut them in half top-to-bottom. Remove the cores and stems (I like to use a melon baller and/or a pairing knife). Slice the apples halves crosswise as thinly as you can with a knife, or to about 1/16-inch thickness with a mandoline. Leaving a 1/2-inch border, fan the apples around the tart in slightly overlapping concentric rectangles — each apple should overlap the one before so that only about 3/4-inch of the previous apple will be visible — until you reach the middle. Sprinkle the apples evenly with the first two tablespoons of sugar then dot with the first two tablespoons butter.
Bake for 30 minutes, or until the edges of the tart are brown and the edges of the apples begin to take on some color. If you sliced your apples by hand and they were on the thicker side, you might need a little more baking time to cook them through. The apples should feel soft, but dry to the touch. If you puffed pastry bubbles dramatically in any place during the baking time, simply poke it with a knife or skewer so that it deflates. This is fun, I promise.
Meanwhile, about 20 minutes into the baking time, make your glaze. In a small saucepan over medium-high heat, melt your last 1/4 cup sugar; this will take about 3 minutes. Cook the liquefied sugar to a nice copper color, another minute or two. Off the heat, add the sea salt and butter and stir until the butter melts and is incorporated. Add the heavy cream and return to the stove over medium heat. Cook, stirring constantly, until you have a lovely, bronzed caramel syrup, just another minute, two, tops. Set aside until needed. You may need to briefly rewarm it to thin the caramel before brushing it over the tart.
After the tart has baked, transfer it to a cooling rack, but leave the oven on. Using very short, gentle strokes, and brushing in the direction that the apples fan to mess up their design as little as possible, brush the entire tart, including the exposed pastry, with the salted caramel glaze. You might have a little leftover. Whatever you do, do not spread it on a sliced apple for a snack. Trust me.
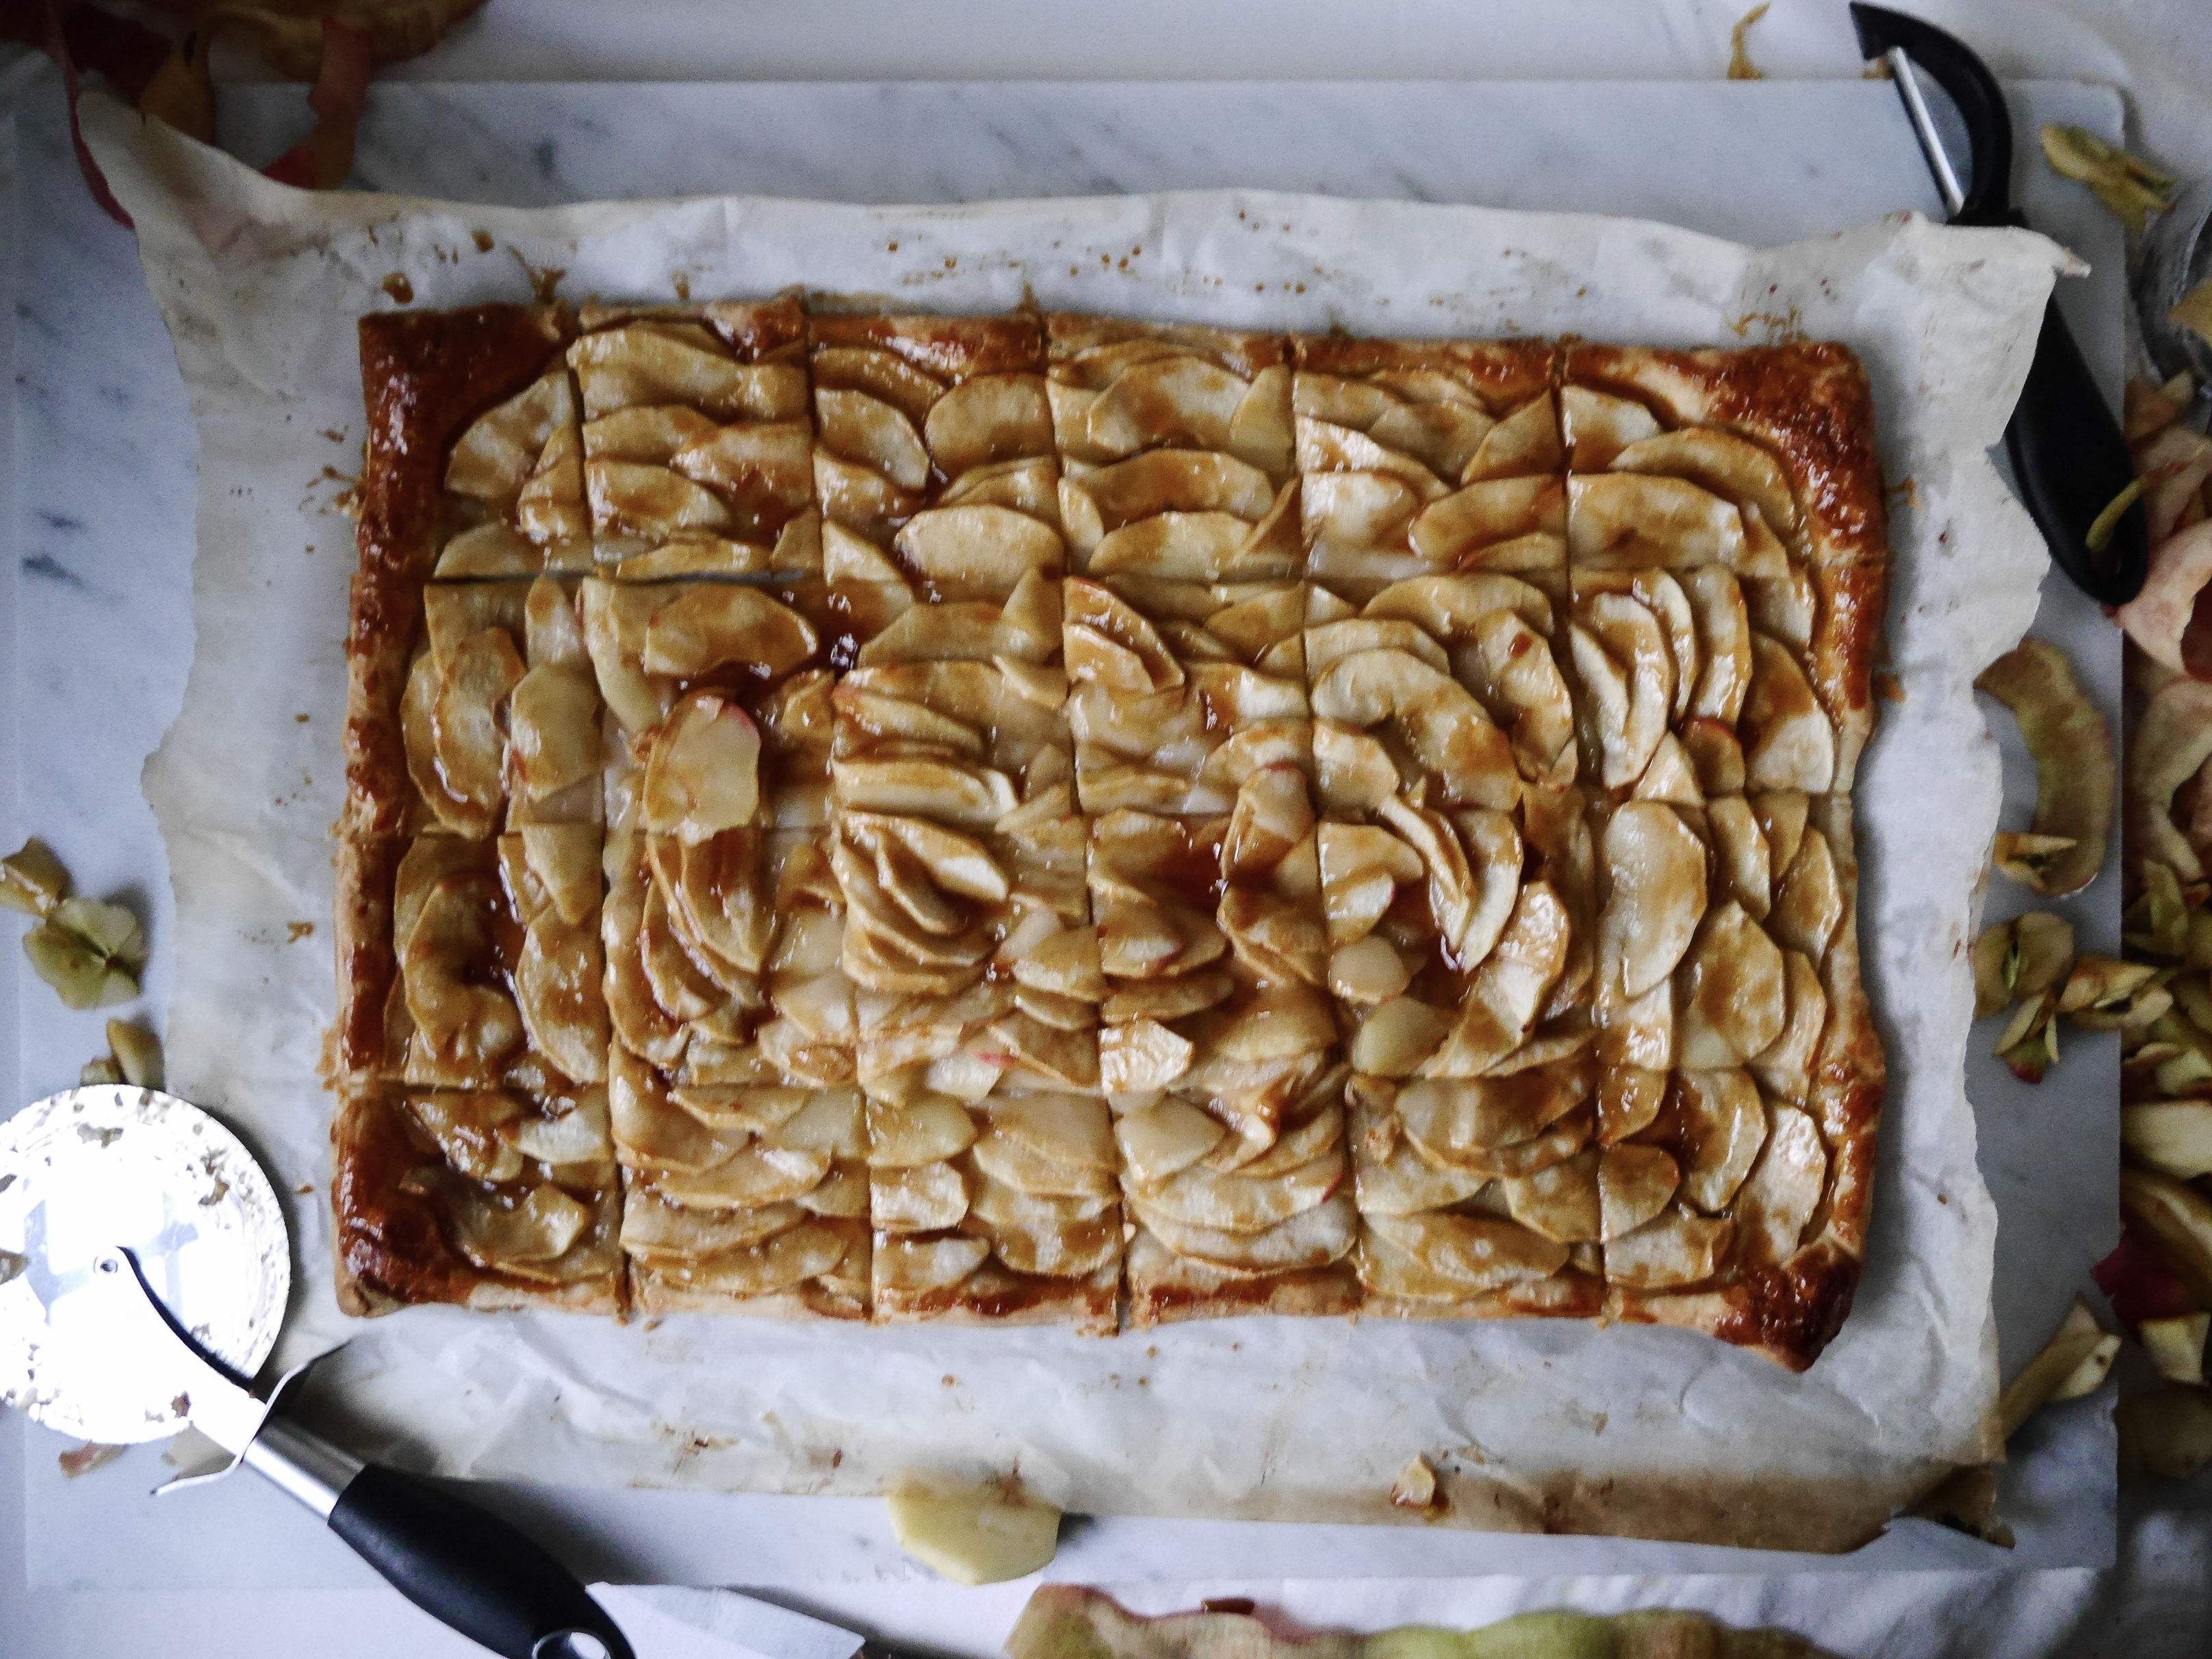
Return the apple tart to the oven for 5 to 10 more minutes, until the caramel glaze bubbles. Let tart cool complete before cutting into 12 squares. Serve plain, with coffee or tea, if you’re feeling grown-up or with a scoop of vanilla ice cream, if you’re feeling particularly indulgent.
[…] need of a totally decadent and simple holiday dessert recipe, check out the deeeelish salted caramel apple tart I just posted! I hope you like it […]